

Coffee filter crafts have become one of my favorite budget-friendly DIY projects because they are simple, colorful, and surprisingly realistic when done right. The first time I tried making a coffee filter coral reef, I honestly expected it to look messy. Instead, the soft textures and layered colors ended up looking a lot like underwater coral displays you see in aquariums.
What I like most about this project is how flexible it is. You can make tiny reef decorations for kids, classroom ocean themes, birthday party backdrops, or even large wall displays without spending much money. Most of the supplies are already sitting in a kitchen drawer or craft bin.
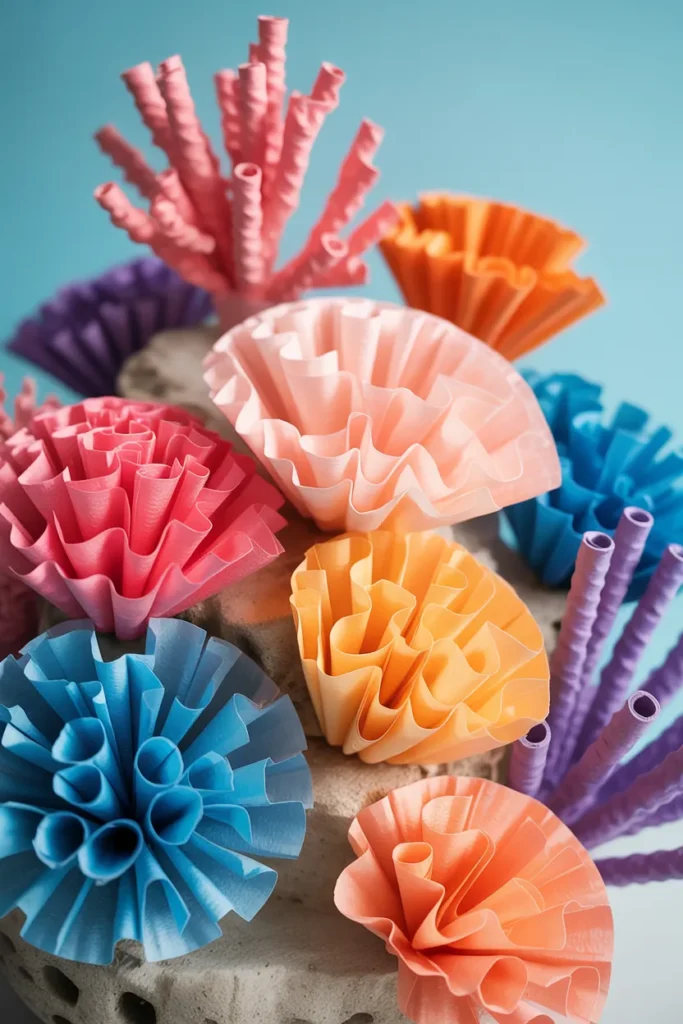
After testing different coloring methods and shapes over the years, I found a few tricks that make these reefs look fuller, brighter, and much easier to assemble. In this guide, I’m sharing the ideas that worked best for me along with practical tips that save time and reduce the usual crafting frustration.
Quick Summary
- Coffee filters create soft textures that resemble real coral
- Basket filters work better than cone filters for fuller shapes
- Food coloring gives the most natural watercolor effect
- Layering different coral styles makes the reef look realistic
- Hot glue works best for large reef displays
- Pipe cleaners and beads add extra ocean texture
- These crafts work well for classrooms, parties, and kids’ activities
How to Color the Coffee Filters?
Coloring is the step that completely changes plain white filters into realistic coral pieces. I tested markers, watercolor paint, acrylic paint, and food coloring, and food coloring mixed with water gave the best results for beginners.
Fill small bowls with water and add a few drops of food coloring. Dip sections of the coffee filter instead of soaking the whole thing. This creates natural color variation that looks more like ocean coral.
If you want brighter shades, washable markers work surprisingly well. Draw random patterns first, then lightly spray the filters with water. The colors spread into soft watercolor effects within minutes.
For older kids or adults, alcohol ink or permanent markers create stronger reef colors. Just make sure to work on a protected surface because the colors spread quickly.
Pro Tip
Dry the filters on a baking rack instead of paper towels. This prevents the colors from sticking and keeps the texture fluffy.
Common Mistake to Avoid
Do not oversoak the filters. Too much water weakens them and makes shaping difficult later.
Coffee Filter Coral Ghosts
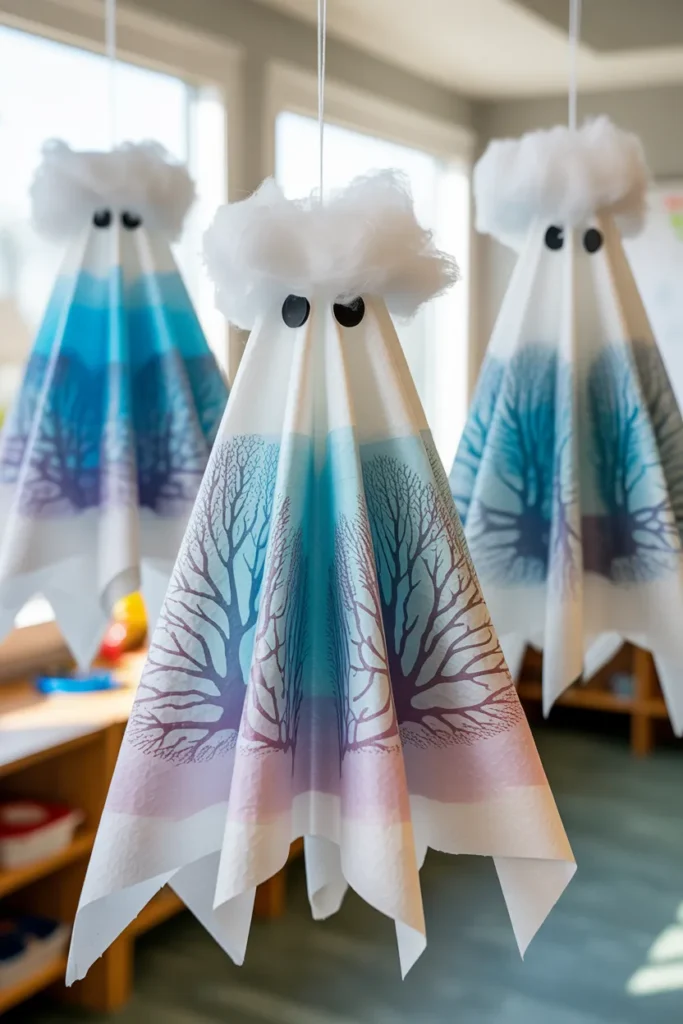
This idea mixes spooky decor with underwater textures, and it always gets attention during Halloween classroom crafts. I made these with my niece last year, and the floating filter layers actually looked like tiny jellyfish ghosts.
Start by placing a cotton ball in the center of the filter. Tie string underneath to form the head. Then fluff the bottom layers so they spread outward like flowing coral tentacles.
Adding soft blue or purple coloring around the edges makes them look more ocean-inspired instead of plain ghosts.
These work well hanging from ceilings, party tables, or classroom bulletin boards.
Pro Tip
Use fishing line instead of string for hanging. It creates a floating underwater effect.
Coffee Filter Coral Trees
Coral trees are one of the easiest ways to build height into a reef display. I usually make these when I need decorations that fill empty corners on party tables or school projects.
Roll dyed coffee filters into loose cone shapes and stack them onto skewers or sticks. Alternate different shades like teal, pink, and orange for a more natural reef appearance.
The uneven edges are actually helpful here because real coral rarely looks perfectly shaped.
You can also lightly crumple the filters before stacking them to create extra texture.
Common Mistake to Avoid
Do not roll the filters too tightly. Loose layers look fuller and more realistic.
Coffee Filter Coral Cluster
This is the design I recommend for anyone making a complete reef scene for the first time. Clusters make the display look detailed without requiring complicated techniques.
Roll several filters into narrow tubes and glue them upright onto cardboard or foam board. Then surround them with crumpled filter pieces in different colors.
I like combining peach, soft pink, yellow, and aqua because those shades mimic tropical coral reefs surprisingly well.
Pipe cleaners bent into curved shapes also help fill empty areas between coral pieces.
Pro Tip
Use different heights when arranging coral clusters. Real reefs look uneven and layered.
Coral Rose Cluster
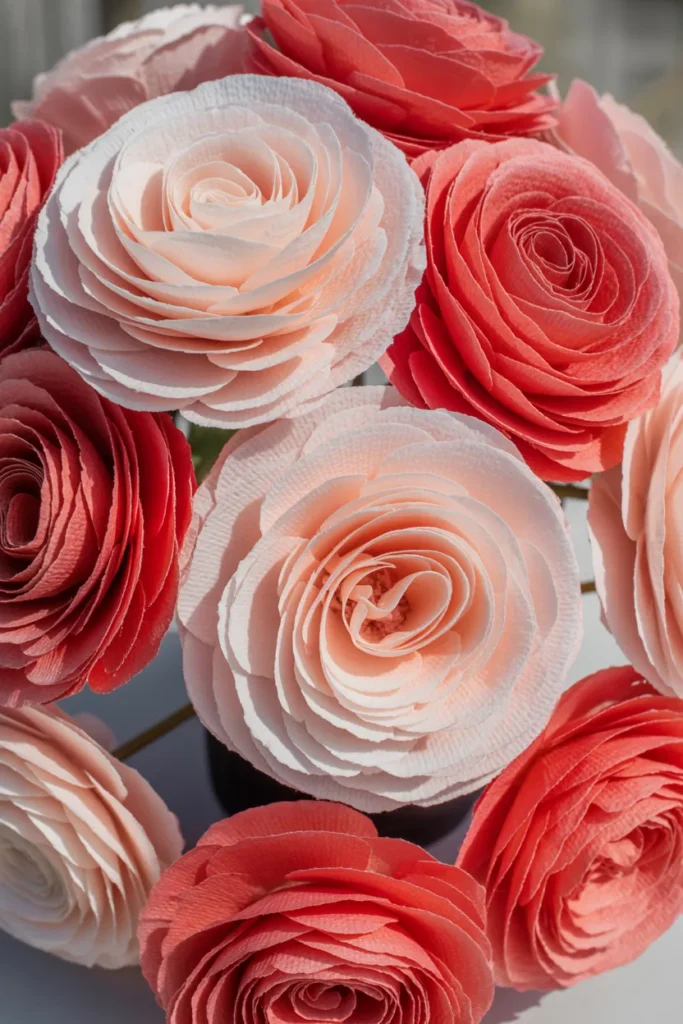
These rose-shaped coral pieces became one of my favorite reef decorations because they add softness to the display. They almost resemble sea flowers underwater.
Cut dyed coffee filters into large petal shapes, then twist and layer them around the center. Secure them with hot glue underneath.
I noticed warm coral shades like salmon, pink, and red create the most realistic underwater effect.
These also look beautiful attached to wreaths, centerpieces, or ocean-themed birthday backdrops.
Common Mistake to Avoid
Avoid using thick glue lines. Too much glue flattens the petals and removes the soft coral texture.
Textured Coral Bloom
If you want your reef display to stand out, oversized coral blooms create a dramatic focal point. I made one for a school ocean display, and it immediately became the centerpiece.
Crumple dyed filters loosely before layering them onto a circular base. The wrinkles naturally resemble folded coral formations.
Adding beads or pearl stickers in the center creates a realistic sea anemone effect.
The key here is layering. The more uneven the folds look, the better the final result appears.
Pro Tip
Mix matte and bright colors together to create depth and avoid a flat-looking display.
Layered Soft Coral
Soft coral styles are perfect when you want a more elegant and delicate reef design. These work especially well for under-the-sea birthday themes.
Stack several coffee filters together and cut rounded edges around them. Once opened, gently fluff each layer outward.
I usually stick to soft shades like cream, pale peach, mint, and light lavender for this design because they resemble ocean coral in shallow reefs.
The finished result looks surprisingly lightweight and airy.
Common Mistake to Avoid
Do not overcut the edges. Thin sections tear easily during fluffing.
Bold Coral Anemone
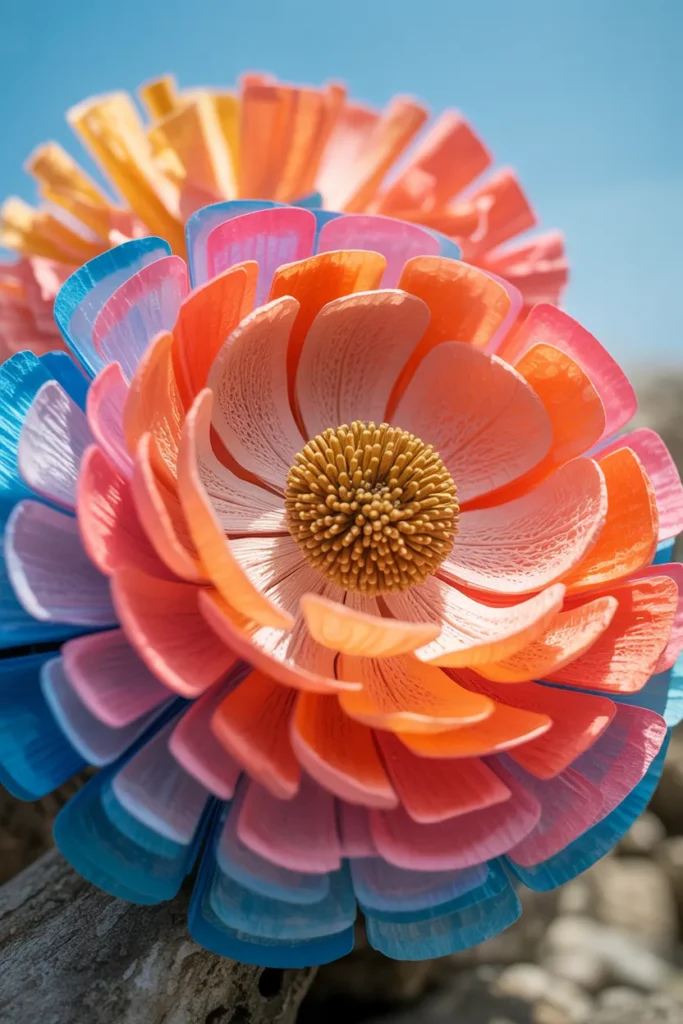
This style creates one of the brightest pieces in the entire reef setup. The layered petals combined with a metallic center make it pop immediately.
Start with brightly dyed filters in orange, blue, or magenta. Layer them into rounded petal shapes and glue them together.
For the center, I like using gold-painted paper balls or bead clusters because they reflect light and create a glowing underwater effect.
This idea works especially well for party photo backdrops.
Pro Tip
Use metallic paint sparingly. Small highlights look more realistic than fully shiny coral.
Colorful Reef Scene
This is where all the individual coral styles come together into one large underwater setup. I usually build these on foam boards because they stay lightweight but sturdy.
Combine rolled tube corals, layered blooms, fringed filters, and crumpled filler pieces. The variety makes the reef feel alive and realistic.
Try placing larger coral pieces toward the back and smaller ones near the front. This creates depth without needing complicated materials.
Adding blue tissue paper around the edges also helps imitate water movement.
Common Mistake to Avoid
Do not place all the bright colors together. Spread them across the reef for a balanced look.
Layered Reef Discs
Layered reef discs are one of the fastest ways to cover large spaces. I often use these for wall decorations because they instantly add volume.
Simply stack dyed coffee filters loosely and glue them in the center while keeping the outer edges fluffy.
The natural ruffles create wave-like textures that resemble large reef formations underwater.
Bright shades like turquoise, purple, and coral pink look especially striking on darker backgrounds.
Pro Tip
Overlap the discs slightly when attaching them to walls. This prevents empty gaps in the display.
Vibrant Reef Petals
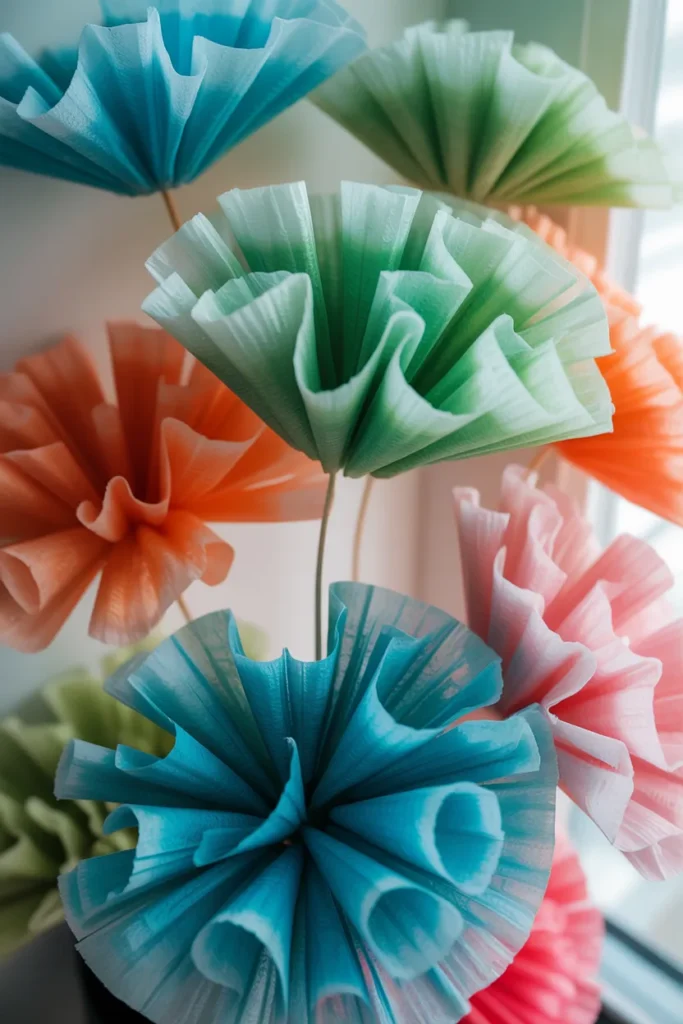
This final idea is perfect if you want the reef to look bold, playful, and colorful. These oversized petal corals work great for kids’ crafts and party decor.
Dip coffee filters into multiple colors at once so the shades blend naturally. After drying, scrunch the filters into loose flower shapes and attach them to pipe cleaners or floral wire.
I found that mixing warm and cool tones together creates the most eye-catching results.
These petals also look beautiful hanging from ceilings for an underwater party theme.
Common Mistake to Avoid
Do not use too many dark colors together. Bright mixed shades create a fresher reef look.
FAQs
Can I use cone coffee filters instead of basket ones?
Yes, but basket filters are easier to shape because they already have wide edges. Cone filters work better when cut open and layered together.
How do I keep the coral reef from falling apart?
For small projects, thick craft glue is enough. For large displays, hot glue and foam board hold everything together much better. I also recommend attaching the larger coral pieces first before filling smaller gaps.
What age group is this craft best for?
Kids ages 5 and up can handle simple coral designs with supervision. Older kids and adults can create more detailed reef displays using layered techniques.
How long do coffee filter coral reefs last?
If kept indoors and away from moisture, they can last for months. I still have a few classroom samples that held their shape for nearly a year.
Conclusion
Coffee filter coral reef crafts are one of those projects that look much more impressive than the effort required to make them. Once you start layering colors and textures, the filters genuinely begin to resemble underwater coral formations.
What I enjoy most is how customizable these projects are. You can keep them simple for kids or turn them into detailed party decorations and classroom displays. The best results usually come from mixing different coral styles together instead of repeating only one design.
If you are trying this for the first time, start small with a simple cluster or layered bloom. Once you get comfortable shaping the filters, building a full reef scene becomes much easier and honestly pretty addictive.