
15 Classic Winnie the Pooh Baby Shower DIY Ideas for a Sweet Vintage Celebration
A classic Winnie the Pooh baby shower is a lovely choice for anyone who enjoys soft colors, woodland details, and the charm of old-fashioned storybooks. Inspired by A.A. Milne’s stories and E.H. Shepard’s illustrations, this theme brings together honey-yellow decorations, sage greenery, warm brown accents, and handmade touches.
There are plenty of ways to bring the Hundred Acre Wood into your celebration without spending too much on decorations. From watercolor invitations and handmade banners to Hunny Pot desserts, baby shower games, and little honey jar favors, these DIY projects can help you create a coordinated party.
Whether you are planning a small gathering at home or a larger baby shower, these 25 Winnie the Pooh baby shower DIY ideas include simple crafts, decorations, food, and activities that you can adapt to your budget and available time.
Key Takeaways:
- Choose muted yellow, sage green, cream, brown, and faded red for a classic Pooh color palette.
- Make personalized invitations, welcome signs, banners, and table decorations.
- Use Hunny Pots, storybooks, moss, and wooden accents for vintage centerpieces.
- Add themed desserts and drinks inspired by Pooh, Piglet, Tigger, and Rabbit.
- Plan easy baby shower games and interactive activities for guests.
- Save money with thrifted materials, printable designs, and simple handmade favors.
Classic Pooh vs. Modern Pooh: Pick Your Palette
Classic Winnie the Pooh takes inspiration from A.A. Milne’s original stories and E.H. Shepard’s traditional illustrations. The artwork has a softer appearance, with muted honey yellow, sage green, cream, warm brown, and faded red. Modern Pooh decorations often use brighter yellow and red, with bolder cartoon-style character designs.
For a vintage-inspired baby shower, choose watercolor artwork, kraft paper, natural wood, gingham ribbon, and simple greenery. These materials help create the feeling of an old storybook setting without needing expensive decorations. If you already have modern Pooh items, you can still use them by keeping the surrounding decorations soft and neutral.
Pro Tip: Pick three main colors for your decorations and use the remaining shades only as small accents. This makes it easier to coordinate invitations, food labels, centerpieces, and party favors.
1. Watercolor Leaves Invitation

A watercolor leaf invitation is a lovely way to introduce the woodland theme before guests even arrive. Start with 5-by-7-inch cardstock and paint a loose border of small leaves around the edges, leaving the center open for the party details. You can use different shades of sage and olive green to create a soft botanical design.
The leaves do not need to look identical. A few uneven brushstrokes give the invitations a handmade appearance that works well with the vintage Pooh theme. Once the paint has dried, print the invitation wording in a simple brown or dark green font, or write it by hand.
Materials: Watercolor paper or cardstock, watercolor paint, a size 6 round brush, and a printer or pen.
Difficulty: Beginner.
Pro Tip: Make one sample invitation before preparing the full batch so you can check how the watercolor looks after drying and whether the text has enough space.
2. Hundred Acre Wood Map Invitation
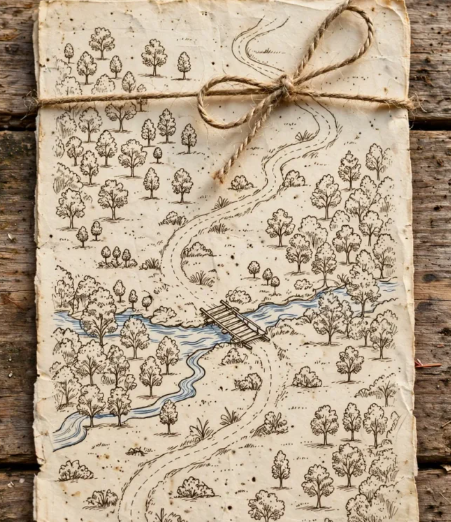
Give your invitations the appearance of an old woodland map inspired by the Hundred Acre Wood. Find a vintage-style forest map graphic that you have permission to use, print it on cream-colored paper, and add the baby shower details to the back. You can include a small welcome message on the front to make the design feel like an invitation to a storybook adventure.
For an aged-paper appearance, lightly dab the sheet with cooled black tea using a sponge. Let it dry completely on a flat surface before adding the final details. Roll each invitation carefully and tie it with natural twine for a charming presentation.
Materials: Printer, cream paper, tea bags, sponge, and twine.
Difficulty: Beginner.
Pro Tip: Test the tea-staining technique on a spare sheet first, and keep the paper only slightly damp to avoid tearing or excessive wrinkling.
3. Canva Templates for Invitations, Thank-You Notes, and Book Cards
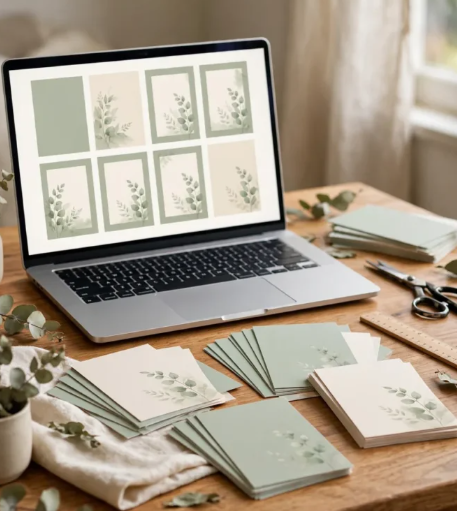
If you want all your paper decorations to match, Canva can help you create a complete Winnie the Pooh baby shower stationery set. Start with an invitation template and customize it using honey yellow, sage green, and warm brown. Choose a traditional serif font for the main wording and keep the illustrations simple.
You can use the same design elements for thank-you cards, food labels, and a small insert asking guests to bring a children’s book instead of a greeting card. Having matching paper details makes the party feel organized without requiring separate designs for every item.
Materials: Canva, printer, cardstock, and a computer or phone.
Difficulty: Beginner.
Pro Tip: Save your finished design as a reusable template before making the other cards. You can duplicate it and change only the wording while keeping the same fonts, colors, and illustrations.
4. Welcome Sign and Food Labels
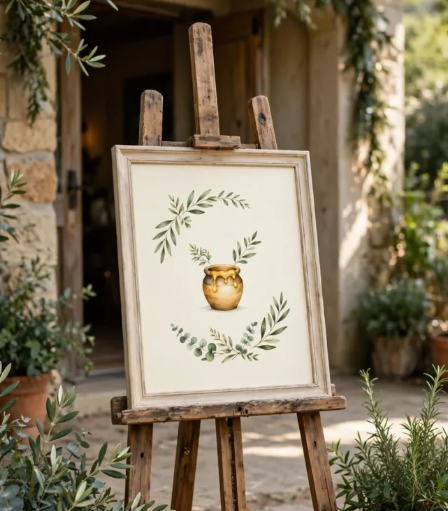
A welcome sign reading “Welcome to Pooh’s Corner” can make the entrance feel like part of the Hundred Acre Wood. Print the wording on 11-by-14-inch paper and place it inside a wooden or thrifted frame. If the frame has a shiny or outdated finish, you can repaint it with a matte tan or cream finish to suit the rest of the decorations.
Use the same design for smaller food labels placed beside the desserts and snacks. Names such as “Hunny Pot Parfaits,” “Tigger Tails,” and “Rabbit’s Carrots” make even simple refreshments feel connected to the theme. Arrange the labels in small wooden holders or fold the cardstock into standing tent cards.
Materials: 11-by-14-inch frame, cardstock, printer, and matte spray paint if needed.
Difficulty: Beginner.
Pro Tip: Print all food labels using the same font and background color so the dessert table looks coordinated rather than like a collection of unrelated signs.
5. Pennant Banner on Twine
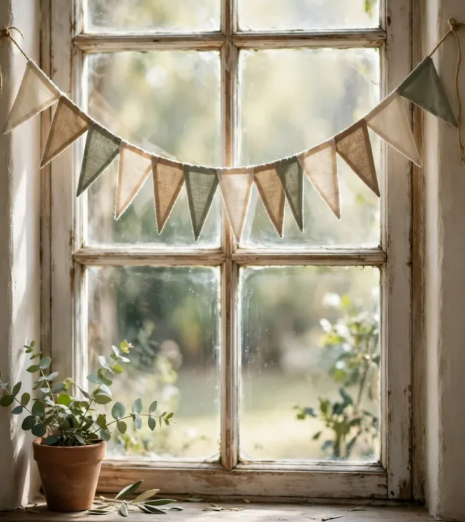
A handmade pennant banner is an easy decoration for the dessert table, gift area, or wall behind the seating space. Cut 12 triangles from kraft paper, each approximately six inches wide and eight inches tall. Punch two small holes near the top of each triangle, or fold the top edge over the twine and secure it with craft glue.
Decorate the pennants with simple honey drops, leaves, tiny stars, or little bee illustrations. You can also leave some pieces plain to keep the design from becoming too busy. Hang the finished banner above the party table or along a wall where it can be seen in photographs.
Materials: Kraft paper, twine, scissors, hole punch, paint, or decorative stamps.
Difficulty: Beginner.
Pro Tip: Leave a little extra twine at both ends so you can tie the banner securely without needing to reposition the individual pennants.
6. Terracotta Hunny Pot Centerpiece

A yellow Hunny Pot is one of the most recognizable decorations for a classic Winnie the Pooh baby shower. A six-inch terra cotta pot makes a useful starting size, and you can place one on each guest table or use different pot sizes to create a larger arrangement for the main table.
Materials: Six-inch terra cotta pot, honey-yellow acrylic paint, black paint pen, floral foam or a small plastic cup, faux or fresh flowers, moss, and a wooden slice.
Difficulty: Beginner.
Time: Approximately 45 minutes, plus drying time.
To make the centerpiece, first wipe the pot clean and let it dry completely. Apply two coats of honey-yellow acrylic paint, allowing each coat to dry before adding the next. Paint a slightly wavy honey-drip pattern around the rim using a darker yellow or gold shade.
Once the paint has dried, write “HUNNY” across the front with a black paint pen. Place a small plastic cup inside the pot or cut floral foam to fit, then cover the top with moss. Finish with yellow flowers and set the pot on a wooden slice for a woodland-inspired base.
Pro Tip: New terra cotta pots can hold moisture, so allow them to dry thoroughly before painting. This helps the paint adhere more evenly and reduces peeling.
7. Floating Balloon and Plush Centerpiece
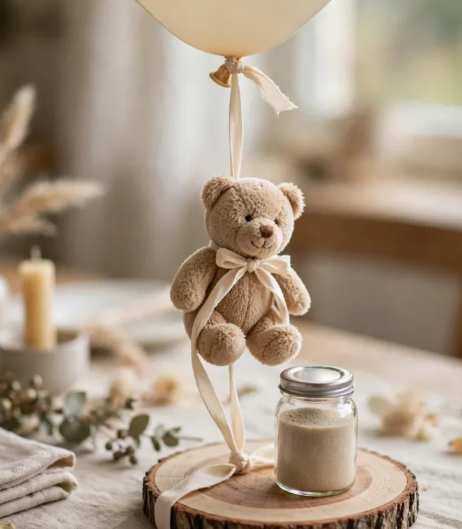
Combine a Pooh plush toy with a helium balloon to create a centerpiece that adds height to your guest tables. Choose a cream or soft yellow balloon and tie a small plush Pooh to the ribbon. The balloon can be secured to a decorative jar filled with sand or another stable weight so the arrangement stays in place.
You can add a little gingham ribbon around the jar or cover the weight with a small piece of cream fabric. This keeps the base from looking plain and connects the centerpiece with the vintage party colors. Since helium balloons do not stay inflated indefinitely, arrange for them to be filled on the day of the shower.
Materials: Latex or foil balloon, helium, small Pooh plush, ribbon, and a weighted jar or suitable balloon weight.
Difficulty: Beginner.
Pro Tip: Keep the ribbon short and secure the weight properly. Never leave balloons or broken balloon pieces where babies and young children can reach them, as they present a choking hazard.
8. Honeybee Garland
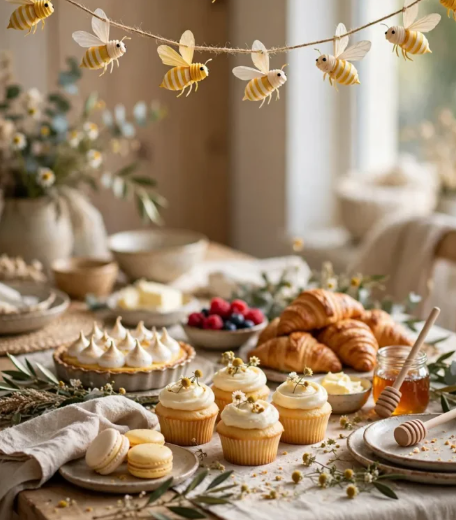
Small honeybee decorations can add a playful touch to walls, dessert tables, and photo areas. Cut bee shapes from yellow cardstock using scissors and a paper template, or use a Cricut machine if you have one. Draw black stripes across each bee and attach two small wings made from vellum or tracing paper.
Once the bees are ready, arrange approximately 20 to 25 pieces along a length of twine. Attach them using glue dots or another suitable craft adhesive, leaving a little space between each decoration. The finished garland can be hung above the dessert table or combined with a green leaf banner.
Materials: Yellow and black cardstock, vellum or tracing paper, black marker, twine, scissors, and glue dots.
Difficulty: Beginner.
Time: Approximately one hour.
Pro Tip: Make a cardboard bee template first so every shape is similar in size and you can cut the remaining pieces more quickly.
9. Storybook Photo Backdrop
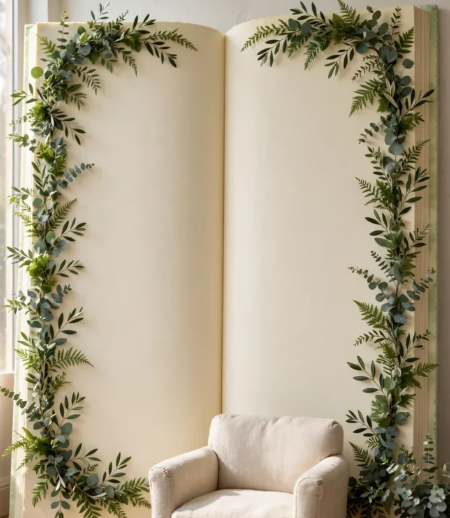
A storybook-inspired backdrop creates a special place for guests to take pictures during the baby shower. Use two foam boards measuring approximately 30 by 40 inches and connect them with wide masking tape along the back so they open like the pages of a book.
Paint the boards in a warm cream shade, then decorate the edges with green leaves, a simple tree, and small woodland details. You can also add a short welcome message in brown lettering. Place the finished backdrop behind a chair or next to a stack of decorative books to create a photo area for the mom-to-be and her guests.
Materials: Two foam boards, cream paint, green paint, masking tape, brushes, and optional decorative lettering.
Difficulty: Intermediate.
Pro Tip: Test the backdrop’s balance before the party and secure it properly so it cannot fall forward when guests stand nearby.
10. Book Page Table Numbers
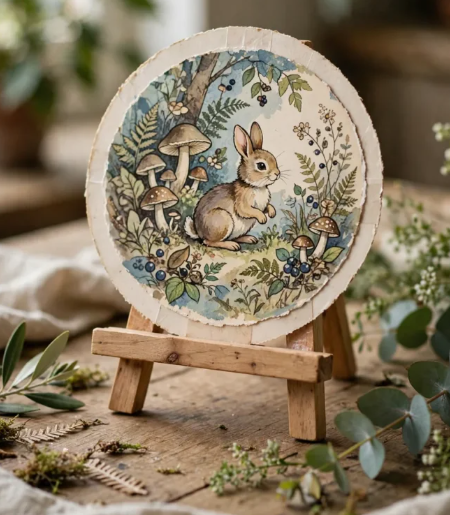
Old storybooks can become useful decorations when you turn their pages into table-number displays. Find a damaged or inexpensive used Pooh book from a thrift store and cut suitable pages into circles. Attach each circle to a small wooden slice or a tabletop number holder, then add the table number in gold lettering.
This idea works especially well when you have several guest tables and want to give each one a slightly different storybook detail. You can also use plain cream cardstock if you would rather not cut up an old book. Keep the numbers large enough for guests to identify their tables easily.
Materials: Used book or cream cardstock, wooden slices or stands, craft glue, scissors, and a gold paint pen.
Difficulty: Beginner.
Pro Tip: Use a damaged or unwanted book rather than a collectible edition, and make sure the finished numbers can stand securely without falling over.
11. Moss, Wood Slices, and Pinecones

For a natural Hundred Acre Wood table display, combine faux moss, wooden slices, and pinecones along the center of the table. Spread a narrow layer of moss as the base, then arrange a few wood slices and pinecones at different points. Add battery-operated tea lights to create a soft glow without using open flames near paper and dried materials.
This decoration is especially useful if you have several long tables to style. You can repeat the same combination along the center without needing a separate elaborate centerpiece for every seat. Add a small yellow Hunny Pot or a few artificial flowers if you want a stronger connection to Pooh.
Materials: Faux sheet moss, wooden slices, pinecones, and battery-operated tea lights.
Difficulty: Beginner.
Pro Tip: Use clean, dry pinecones and faux moss for easier setup and cleanup. Keep the arrangement narrow enough to leave space for plates and serving dishes.
12. Tigger Tail Pretzels

Tigger-inspired pretzel rods are a fun addition to the dessert table. Their orange color and dark stripes make them recognizable, while the salty pretzels balance the sweetness of the coating. Start by melting orange candy melts according to the package directions, then dip each pretzel rod about two-thirds of the way into the coating.
Place the dipped pretzels on parchment paper. Melt a small amount of black candy coating and transfer it to a piping bag or food-safe zip bag with a tiny corner cut off. Add several stripes while the orange coating is still slightly soft, then leave the pretzels to set completely.
Materials: Pretzel rods, orange and black candy melts, parchment paper, and a microwave-safe bowl.
Difficulty: Beginner.
Yield: Approximately 20 pretzel rods, depending on the coating and dipping method.
Pro Tip: Avoid overheating the candy melts, as thick coating is harder to spread evenly. Follow the package instructions for melting and setting.
13. Honeycomb Cereal Snack Mix

A honey-themed snack mix is an easy treat to prepare in a large bowl or portion into individual cups. Combine four cups of honey-flavored cereal with two cups of mini pretzels and one cup of white chocolate chips. Drizzle a small amount of warm honey over the mixture and toss gently to distribute it.
Spread the snack mix over parchment paper and allow it to sit for approximately 20 minutes so the coating can settle. You can serve it in clear cups with small paper labels or place it in a large serving bowl for guests to help themselves.
Materials: Honey-flavored cereal, mini pretzels, white chocolate chips, honey, and parchment paper.
Difficulty: Beginner.
Pro Tip: Check the ingredient labels for possible allergens and keep nuts or other allergenic ingredients in separate, clearly labeled containers if you choose to serve them.
14. Piglet Punch and Pooh Honey Lemonade
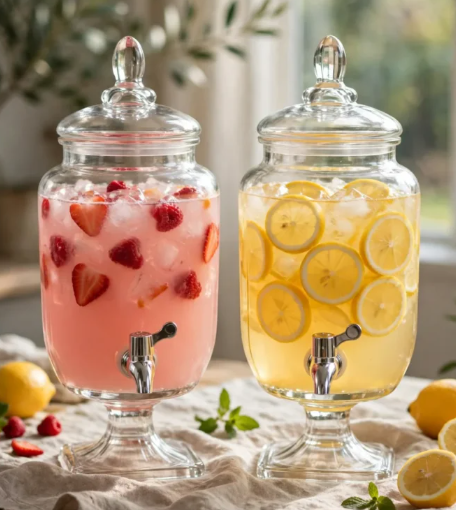
Offer two themed drinks so guests can choose between a pink refreshment and a golden honey-inspired lemonade. For Piglet Punch, combine one liter of strawberry lemonade with one liter of lemon-lime soda and add a scoop of raspberry sherbet. Serve it chilled in a large glass dispenser or individual cups.
For Pooh Honey Lemonade, dissolve half a cup of honey in one cup of warm water. Allow the mixture to cool, then combine it with one cup of lemon juice and four cups of cold water. Stir well and serve over ice. Both drinks are alcohol-free and can be displayed with small signs featuring Piglet and Pooh-inspired names.
Materials: Strawberry lemonade, lemon-lime soda, raspberry sherbet, honey, lemon juice, water, and serving containers.
Difficulty: Beginner.
Pro Tip: Prepare the honey syrup ahead of time and refrigerate it. Add the soda and sherbet to the pink punch shortly before serving to keep its texture more enjoyable.
15. Rabbit’s Carrots
These carrot-inspired strawberries are a playful way to add something different to the baby shower dessert table. Choose firm, dry strawberries with their green tops still attached. Melt orange candy coating according to the package directions and dip each strawberry until it is covered, leaving the leafy top visible.
Place the dipped strawberries on parchment paper and refrigerate them until the coating sets. Arrange them on a white serving plate or inside a small basket lined with cream parchment paper. Their carrot-like appearance makes them a fun addition to the Rabbit-themed food section.
Materials: Fresh strawberries, orange candy melts, parchment paper, and a serving plate.
Difficulty: Beginner.
Pro Tip: Dry the strawberries thoroughly before dipping because moisture can make the candy coating difficult to spread and set properly.
Frequently Asked Questions
What is the difference between classic and modern Winnie the Pooh?
Classic Winnie the Pooh is inspired by A.A. Milne’s original stories and E.H. Shepard’s softer pen-and-ink illustrations. The designs generally use muted yellow, sage green, cream, brown, and faded red. Modern Pooh decorations usually feature brighter colors and a more colorful Disney cartoon appearance.
For a traditional baby shower, look for storybook-style illustrations, watercolor details, and natural decorations such as wood, moss, and gingham ribbon.
Pro Tip: Check the actual illustration and colors when shopping online, as product titles do not always make the difference between classic and modern designs clear.
How can I make Winnie the Pooh baby shower decorations on a budget?
Start with simple DIY projects using materials that are easy to find or already available at home. Paint terra cotta pots as Hunny Pots, make paper banners, create your own food labels, and use thrifted books for table decorations. Moss, pinecones, wooden slices, and twine can also add woodland details without requiring expensive party supplies.
You can save more by using one coordinated printable design for invitations, welcome signs, table numbers, and thank-you cards.
What games can I DIY for a Winnie the Pooh baby shower?
There are several easy games you can prepare using paper, pens, and a few inexpensive supplies. Try The Price Is Right: Baby Edition, Name That Storybook Quote, ABC Baby Items, Pin the Tail on Eeyore, or Guess the Honeycomb Count. These activities are easy to adapt for small and large groups.
A onesie decorating station is another good choice because guests can take part in a creative activity while making something useful for the baby.