21 Clever DIY Pantry Shelving Ideas for Small and Large Kitchens
A pantry is easier to use when every item has a place and you can reach your ingredients without moving everything around. The right shelves help you store groceries, jars, cans, baskets, and kitchen appliances while making better use of the space you already have.
These 21 DIY pantry shelving ideas include simple wooden shelves, corner storage, pull-out cabinets, open cubbies, and other practical designs. Some work well in small kitchen cupboards, while others are better suited to walk-in pantries with more room.
Before starting, measure your pantry and think about what you need to store. The shelf material, depth, spacing, and supports all matter, especially if you plan to keep heavy cans, glass jars, or small appliances on them.
Key Takeaways
- Choose sturdy materials and supports for the weight your shelves will carry.
- Use adjustable, pull-out, and door-mounted storage to save space.
- Make corners and narrow walls useful with suitable shelving.
- Keep everyday ingredients within easy reach.
- Add good lighting, labels, and storage baskets to keep the pantry organized.
What Are Pantry Shelves Made Of?
Pantry shelves are commonly made from plywood, solid wood, laminated boards, metal, or wire. Wood gives you more freedom to choose the shelf size and finish, while laminated boards have a smooth surface that’s easy to wipe clean. Metal and wire shelving can be useful when you want adjustable storage without building a custom unit.
The right material depends on the size of your pantry, the weight of your groceries, and the amount of moisture in the room. A long shelf holding cans needs more support than a short shelf for lightweight packets. Choosing the right materials and installing them properly can help prevent bending, swelling, and loose brackets.
Pro Tip: Measure each wall and decide what will go on every shelf before buying materials. This helps you choose the right thickness, depth, and support system.
1. Bracketed Wood Shelves
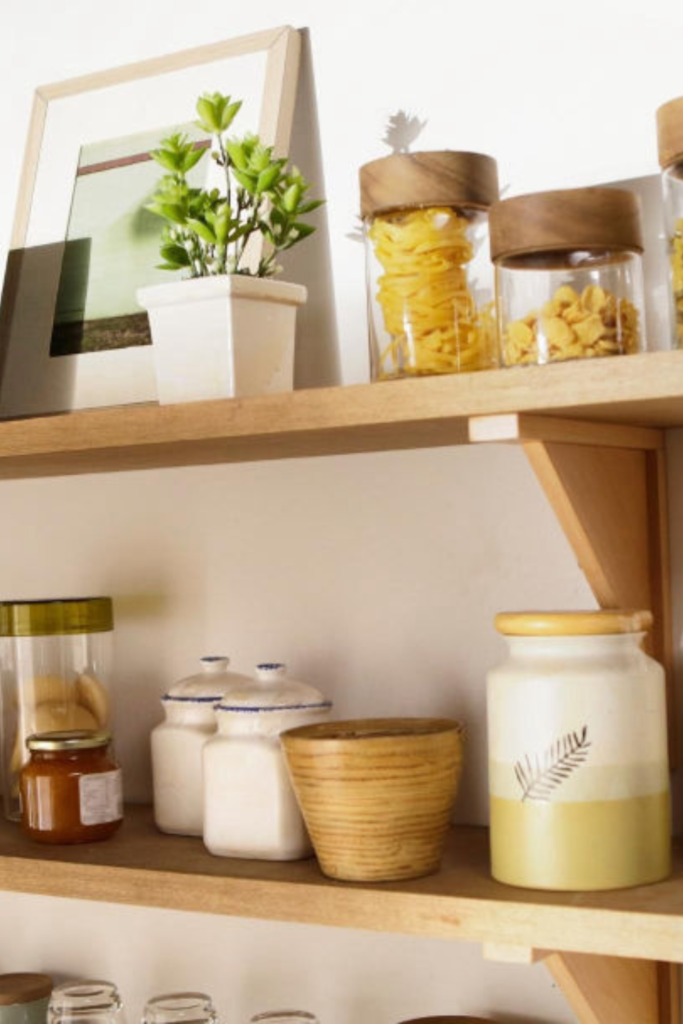
Wooden shelves with brackets are a straightforward option for a pantry of almost any size. You can use plywood with finished edges or solid wood, then attach the shelves to sturdy brackets fixed to suitable wall supports. Natural wood gives the pantry a warm look, while painted white shelves suit a lighter kitchen.
Arrange the shelves according to the items you use most often. Keep cans and heavier jars on lower levels, with spices and smaller containers above. If you’re installing long shelves, add enough brackets to support the weight and reduce the chance of the boards bending.
Pro Tip: Use a level to mark the bracket positions, and finish exposed wood with a suitable protective coating that can be cleaned easily.
2. Full-Wall Pantry Units
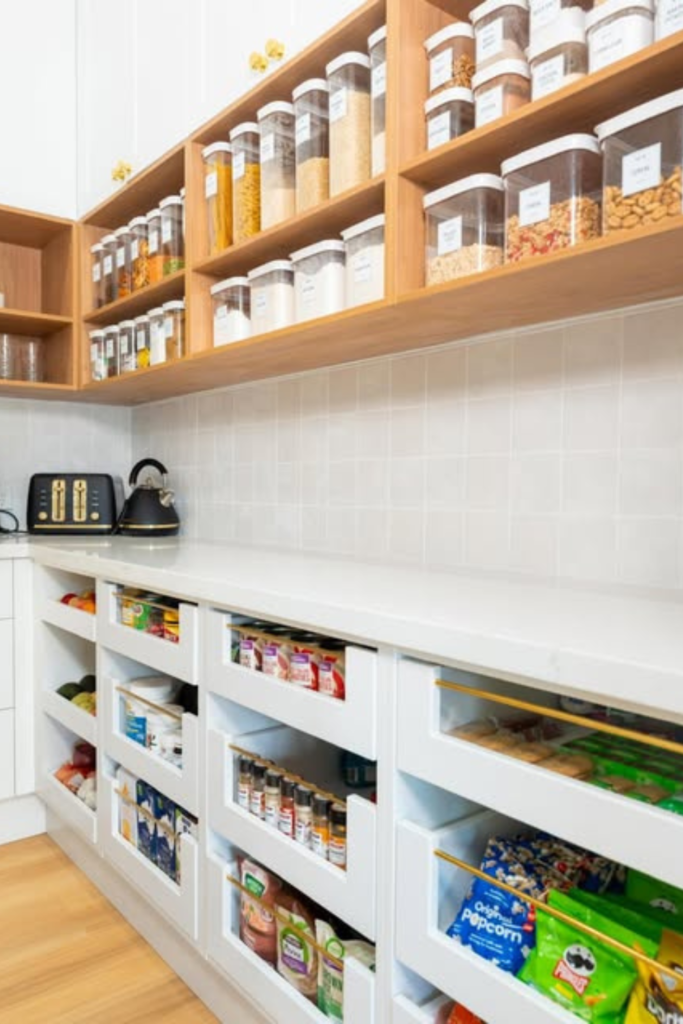
A full-wall pantry unit gives you plenty of room for groceries, kitchen appliances, and bulk supplies. You can combine open shelves at the top with drawers or cabinets below. Deeper lower storage works well for large bags and bulky items, while shallower upper shelves make jars and smaller containers easier to see.
This design suits a dedicated pantry room or an unused kitchen wall. Keep everyday ingredients around waist-to-eye level, and reserve the highest shelves for items you don’t need regularly. If you use deep drawers, group similar products together so smaller packets don’t disappear behind larger containers.
Pro Tip: Measure your largest appliances and storage containers before deciding on drawer widths and shelf heights.
3. Curved Corner Shelves
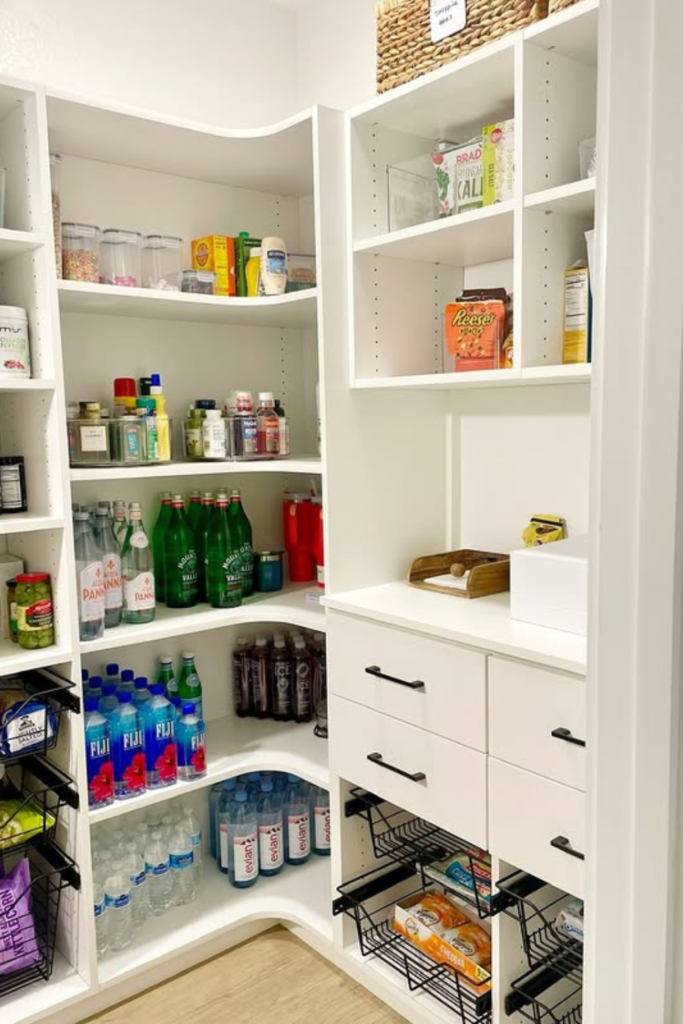
Curved corner shelves help you use the space where two pantry walls meet. They work particularly well in walk-in pantries, where a corner might otherwise become difficult to reach. You can cut plywood into rounded shapes and support each shelf with suitable brackets or securely installed cleats.
Use the lower shelves for heavy cans and larger containers, and keep smaller jars or lightweight supplies above. Avoid making the shelves too deep, as items at the back can be difficult to reach. A curved front also leaves the corner looking less bulky than a collection of sharp-edged shelves.
Pro Tip: Make a cardboard template first to check the shape and depth before cutting the wood.
4. Built-In Work Shelf
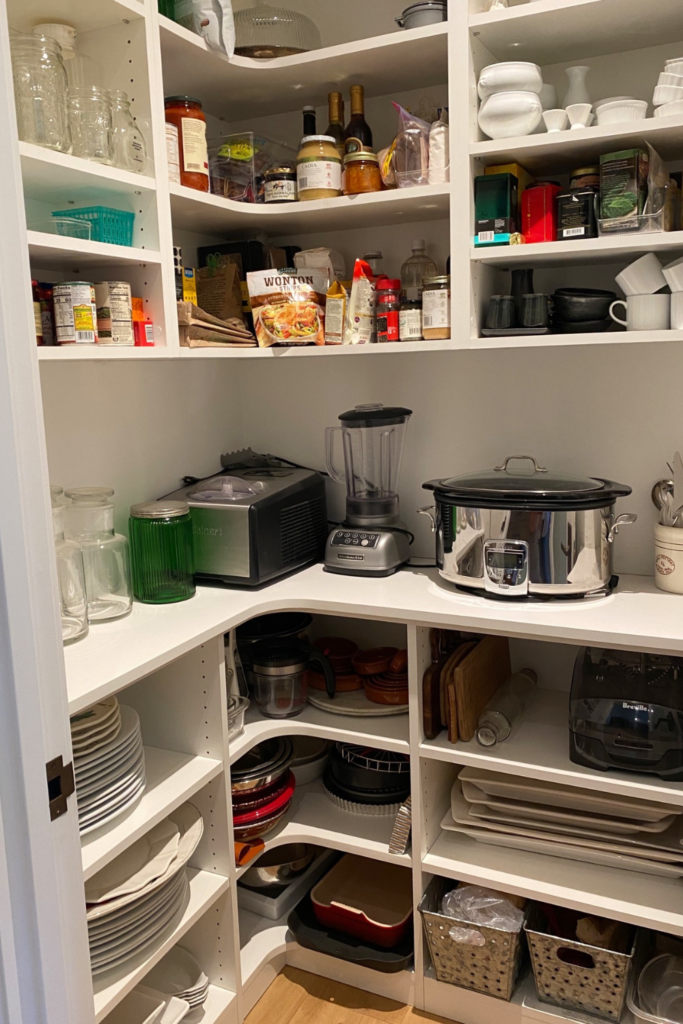
A built-in work shelf gives you a place to keep appliances such as a coffee maker, toaster, or stand mixer. A sturdy wooden or laminated work surface can sit between side panels, with storage shelves above and below. This arrangement is useful when you want to keep small appliances off the main kitchen counter.
Leave enough space above the surface for appliances to fit comfortably. Check the location of electrical outlets and make sure cords can reach safely without stretching across the worktop. The surface should also be easy to wipe down, especially if you use it for food preparation.
Pro Tip: Check the size and ventilation requirements of each appliance before fixing the work surface in place.
5. Uniform Container Shelves
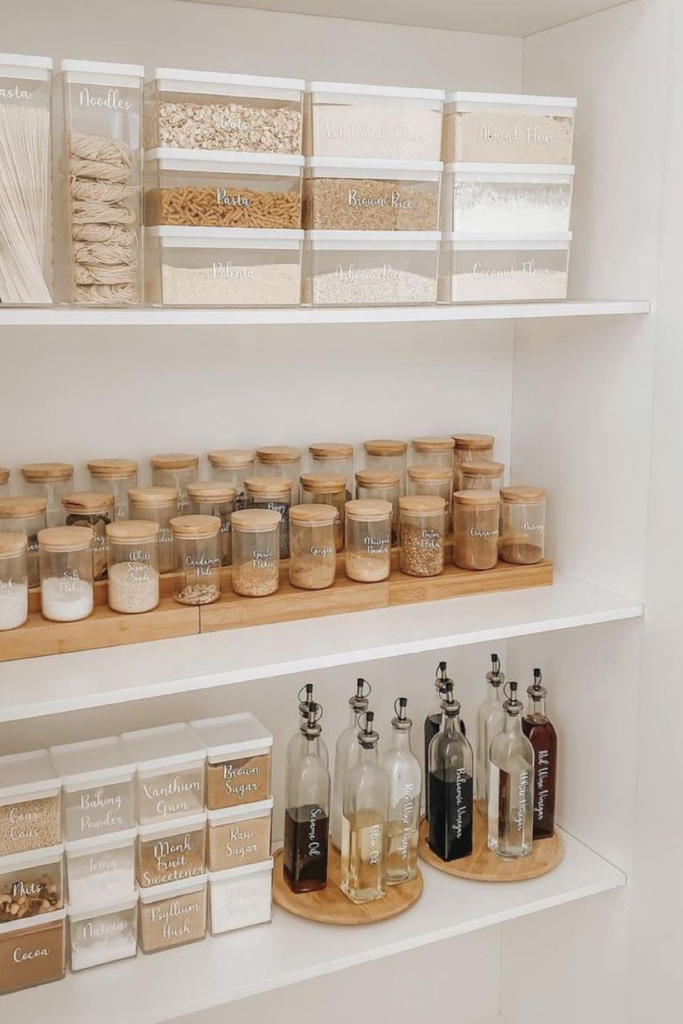
If your pantry often looks messy because of different packaging, matching containers can help. Adjustable white shelves paired with clear food containers create a consistent arrangement for flour, rice, pasta, cereal, and other dry ingredients. Clear sides also make it easier to see when supplies are running low.
Choose containers that fit the shelf depth and hold the amount of food you normally buy. Labels are useful when several ingredients look alike, and adjustable shelves give you room to store taller jars or boxes when needed. You don’t have to replace every container at once; start with the items that create the most clutter.
Pro Tip: Label each container with its contents and keep the original food packaging or relevant storage information when needed.
6. Pull-Out Pantry Cabinet
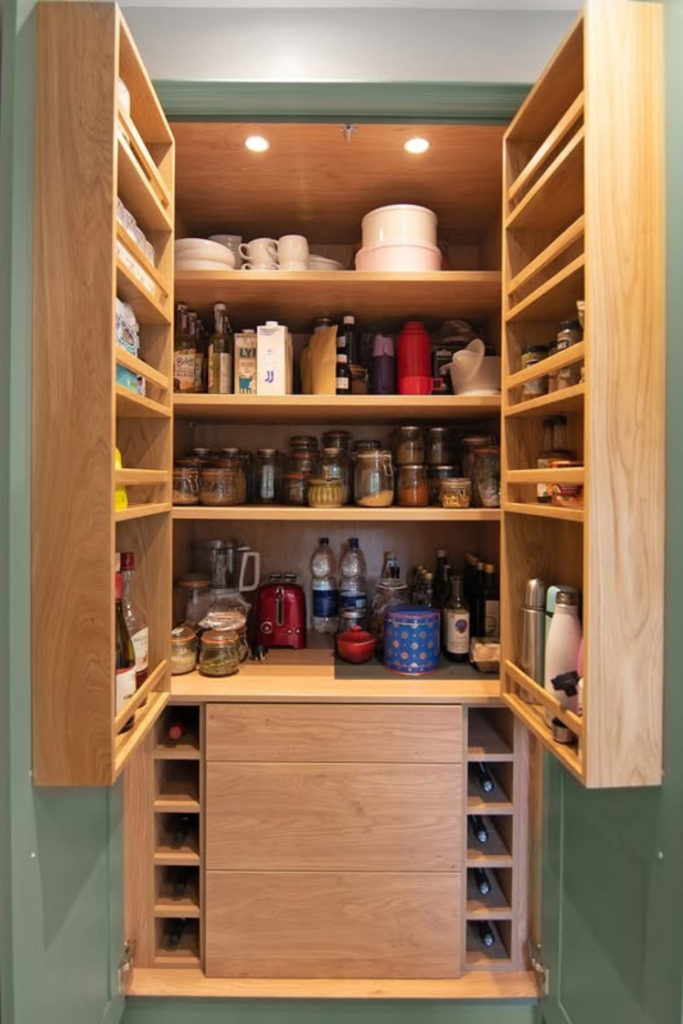
A pull-out pantry cabinet makes use of narrow gaps between kitchen cabinets or appliances. The unit has shallow shelves that slide forward, allowing you to reach items at the back without emptying the whole cupboard. It can be a useful choice for small kitchens where a full pantry cabinet won’t fit.
Store heavier cans and bottles on the lower shelves and lighter packets higher up. Measure the opening carefully before building the unit, including the space needed for the sliding hardware. Choose slides that can support the combined weight of the cabinet and everything you plan to store inside it.
Pro Tip: Check the cabinet’s full opening and closing movement before filling it to make sure it won’t hit nearby handles or appliances.
7. Galley Pantry Shelves
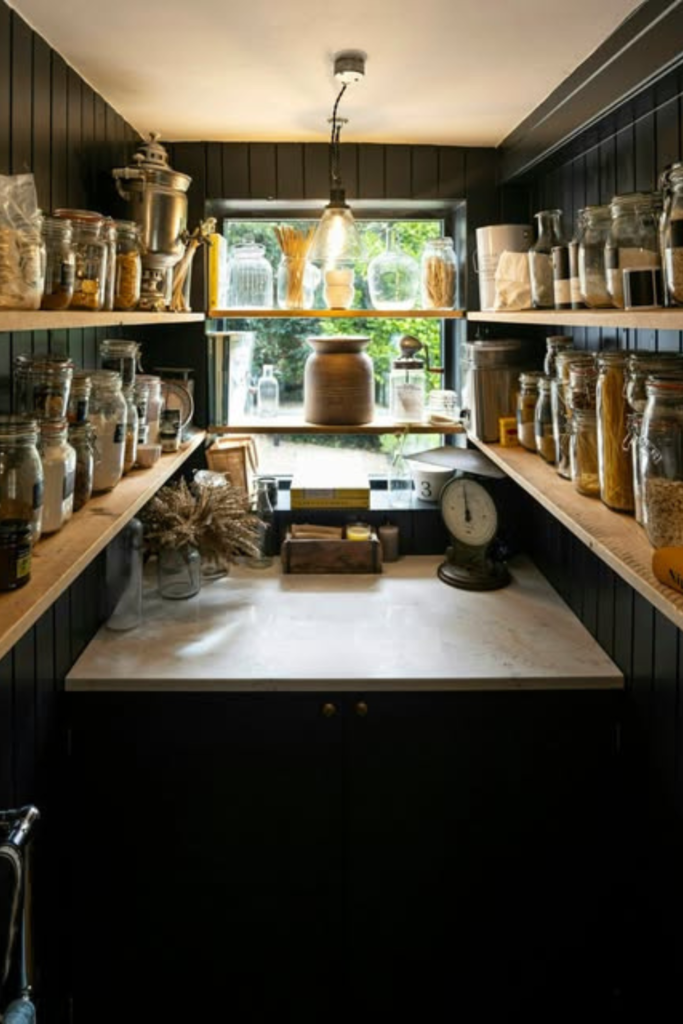
Galley shelving uses both side walls of a long, narrow pantry. With shelves on either side and a walkway in the middle, you can separate groceries into useful groups without needing a large room. One wall might hold cans and jars, while the other stores baking ingredients, snacks, and dry goods.
Keep the shelves shallow enough to leave comfortable walking space. Frequently used items should be close to the entrance, while bulk supplies can go farther inside. If both walls have shelves at similar heights, the pantry will also be easier to organize and maintain.
Pro Tip: Measure the remaining walkway after accounting for the depth of the shelves on both sides.
8. Door Storage Shelves
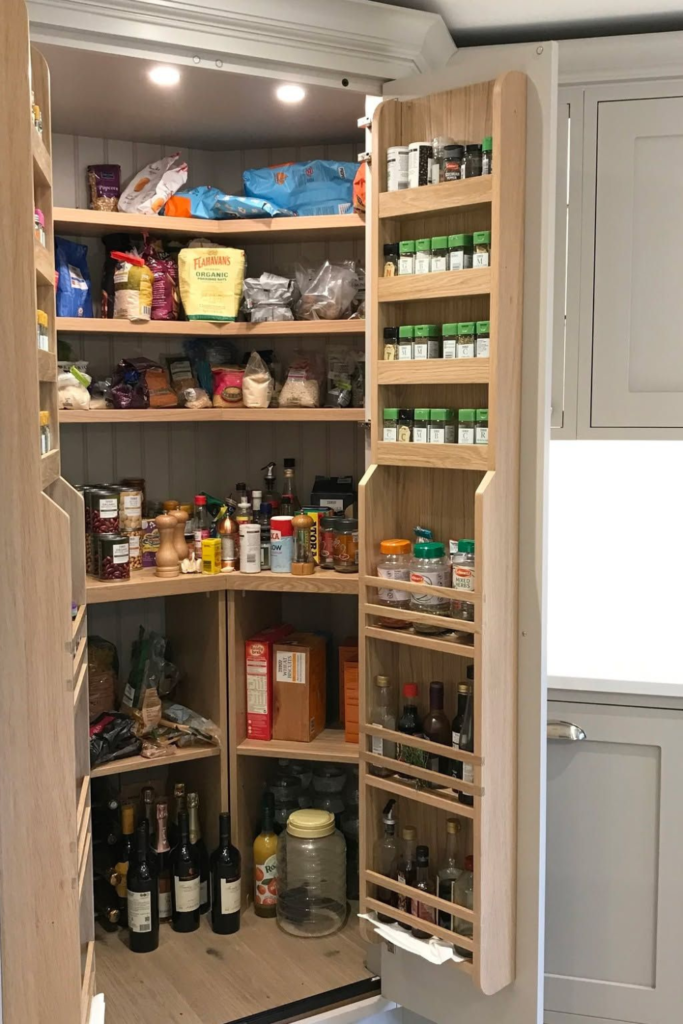
The back of a pantry door can hold smaller items that take up valuable shelf space. Narrow racks or hanging baskets are useful for spice packets, seasoning sachets, snack bars, and lightweight jars. This can be especially helpful in a small cupboard where the main shelves are already full.
Before installing a rack, check that the door can support it and still close properly. Measure the clearance between the door and the shelves inside the pantry. Avoid placing heavy glass containers on lightweight racks that aren’t designed to carry them.
Pro Tip: Store small items in labeled door baskets and test the door’s movement before loading the racks.
9. Wraparound Pantry Shelves
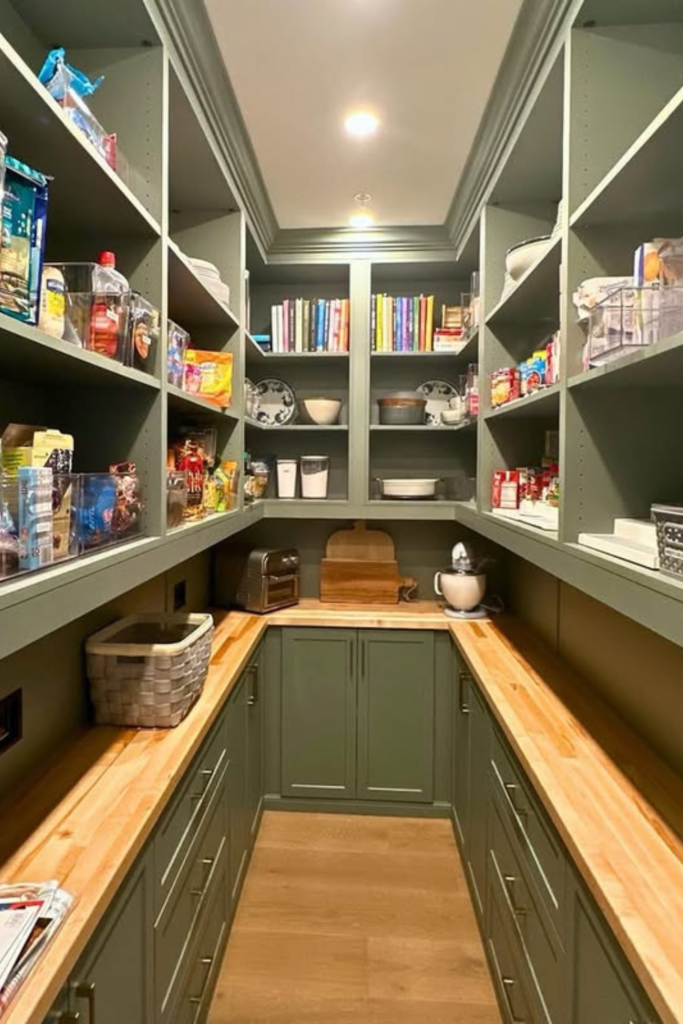
Wraparound shelving runs along several pantry walls, creating storage around the room. This layout works well in walk-in pantries where you want separate places for canned food, baking supplies, breakfast items, and bulk groceries. Keeping the shelf depth consistent can also make the arrangement easier to plan.
Corners need extra attention because items can become hidden behind other containers. Put everyday ingredients near the entrance and use the less accessible areas for backup supplies. Long shelves should have enough support for their full length, particularly if you plan to store heavy jars and cans.
Pro Tip: Use baskets or turntables in awkward corners so you can reach items without moving everything in front.
10. Wire Rack Shelving
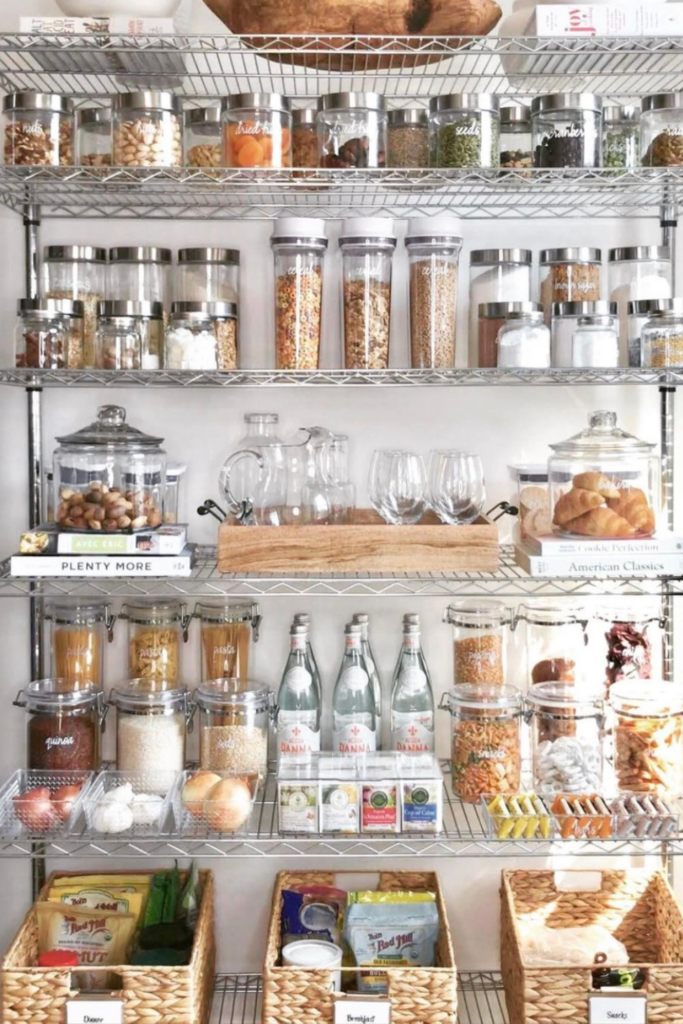
Wire rack shelving is useful when you want pantry storage without building wooden shelves. Freestanding metal units often have adjustable levels, allowing you to make room for cereal boxes, food containers, baskets, and kitchen supplies. Their open design also allows light to pass through the shelves.
Use small bins to keep loose packets from slipping through the gaps. Place heavier items on the lower levels and check the rack’s weight limit before loading it. If the unit is tall, secure it according to the manufacturer’s instructions to reduce the risk of tipping.
Pro Tip: Make sure the rack stands level before adding groceries, and use storage bins that sit securely on the wire surface.
11. LED-Lit Shelving
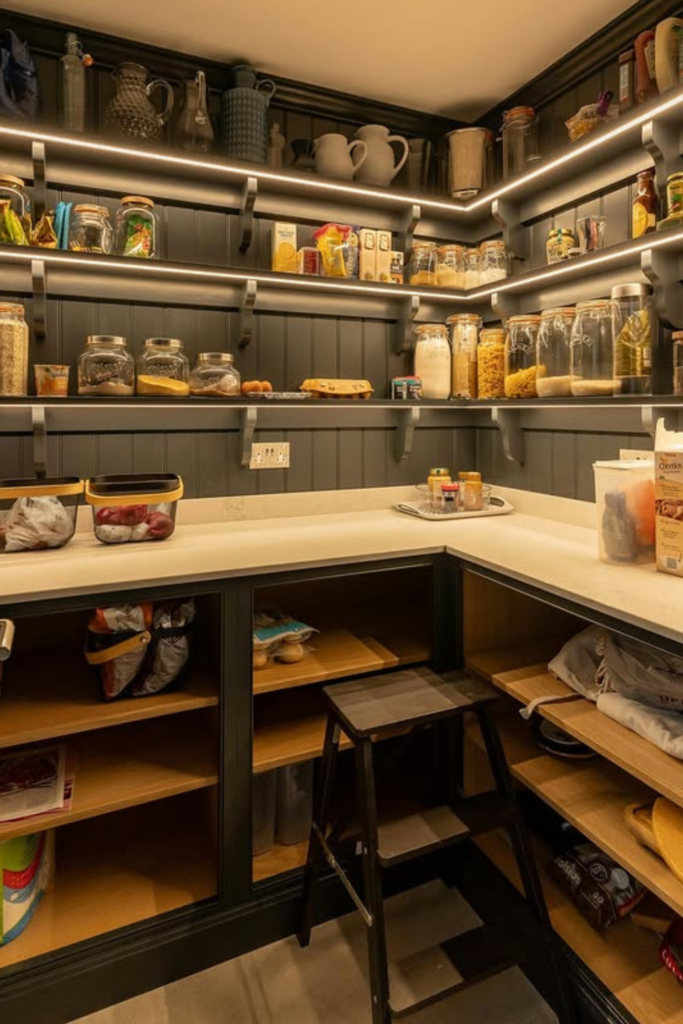
LED lighting can make a pantry easier to use, especially when the shelves are deep or the room has little natural light. You can attach suitable LED strips beneath wooden shelves so the light reaches the level below. Small battery-powered lights are another option when an electrical outlet isn’t available nearby.
Think about where the light will fall before installing it. Lights placed too far back may leave the front of the shelf in shadow, while exposed wiring can become inconvenient during cleaning. Choose lighting designed for the installation location and follow the manufacturer’s instructions.
Pro Tip: Position under-shelf lighting toward the front so labels and containers are easier to see.
12. Utility Wire Shelves
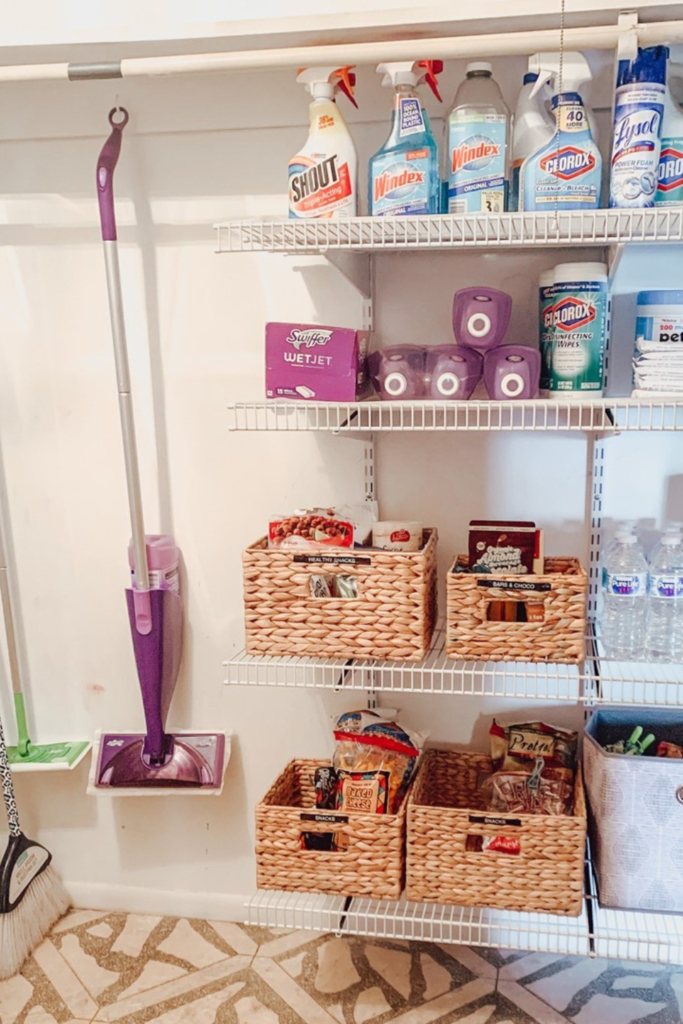
Utility wire shelves work well in pantries that also hold household supplies. Adjustable metal shelving can accommodate paper towels, storage bins, spare bags, and other items that don’t fit neatly in kitchen cabinets. It is particularly useful in a laundry room or multipurpose storage area.
If you keep food and cleaning products in the same room, give them separate storage areas. Keep chemicals in their original containers and follow the instructions on their labels. Shelves should also be spaced to fit taller bottles and larger household supplies without wasting room above them.
Pro Tip: Use separate, clearly marked sections for groceries and household products to prevent spills or chemical products from contaminating food.
13. Labeled Wire System
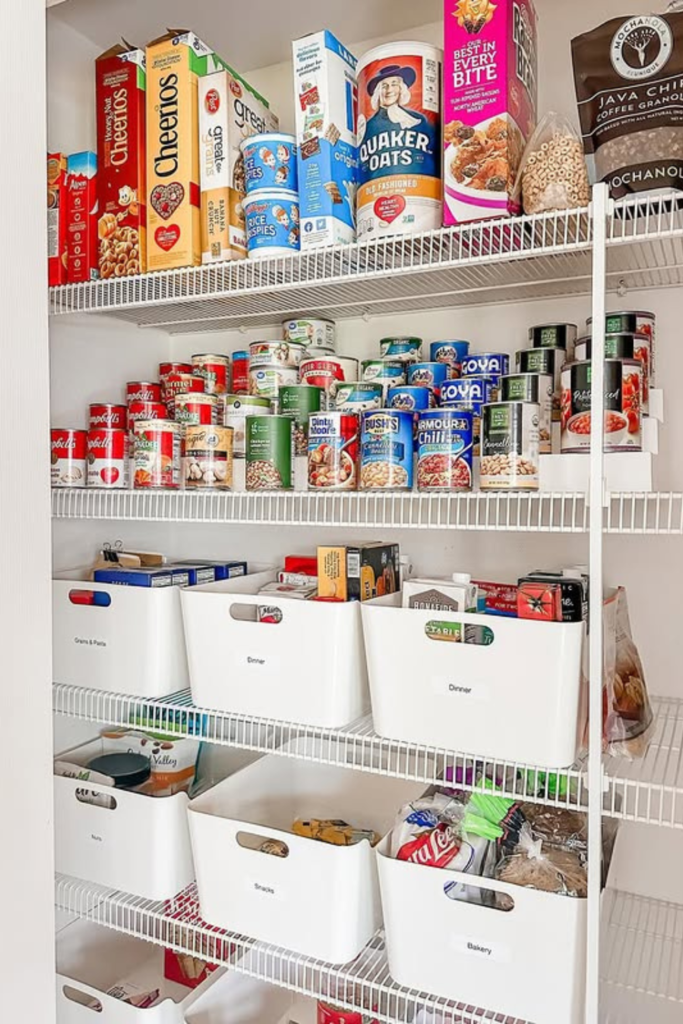
A labeled wire shelving system gives you adjustable storage without requiring custom carpentry. You can change the shelf heights to fit cans, cereal boxes, jars, and baskets as your needs change. Labels on shelves or bins help everyone in the household return items to the right place.
Use bins for small packets and loose snacks that might fall through the wire gaps. Place bulky groceries on lower levels, and leave enough space between groups to remove items comfortably. This setup is especially useful for a reach-in pantry where shelf space is limited.
Pro Tip: Use removable labels so you can change the arrangement when you buy different groceries or reorganize the pantry.
14. Bracketed Recess Shelves
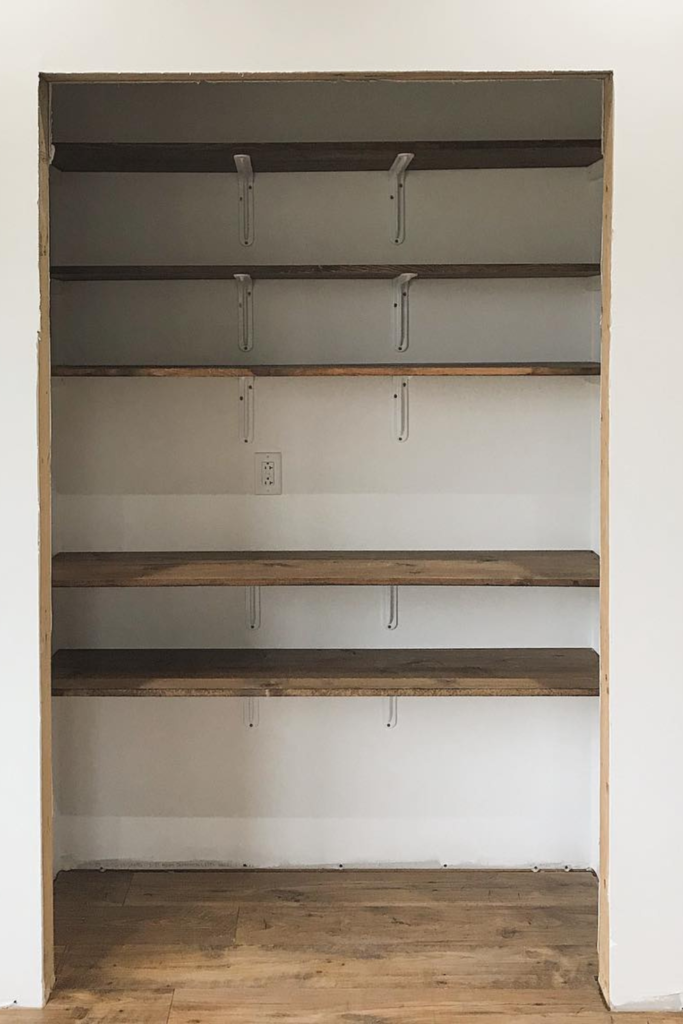
If your pantry has a wall niche or recessed opening, you can turn it into useful storage with a few wooden shelves. Brackets attached to suitable wall supports can hold jars, spices, small containers, and baking supplies. The shelves can be painted to match the wall or finished in natural wood.
Measure the opening carefully so the shelves fit without blocking nearby doors or trim. If you need to create a new recess, check for wiring, plumbing, and structural elements before cutting into the wall. For an existing niche, adjustable shelf positions can make the space easier to use as your storage needs change.
Pro Tip: Choose shelf supports based on the wall material and the weight of the items you plan to store.
15. Mixed Material Shelves
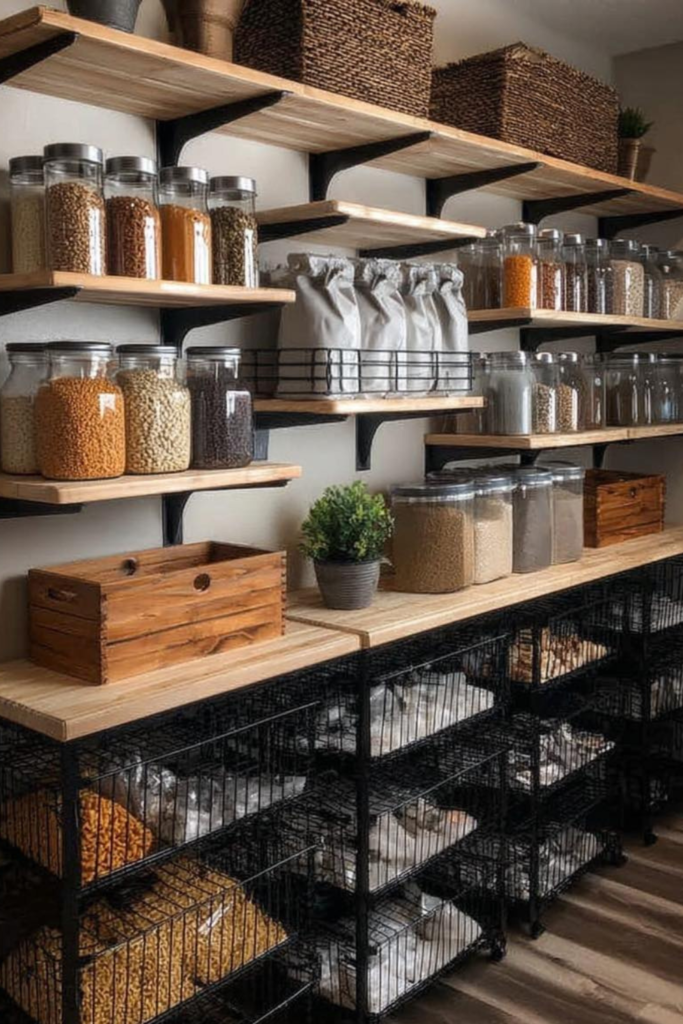
Combining wooden shelves with metal brackets and wire baskets gives you different storage options in one pantry. The wood provides a solid surface for jars and cans, while baskets keep loose packets and smaller items together. This arrangement works well when the pantry is open and visible from the kitchen.
You can pair light wood with black metal for contrast or use white supports for a lighter appearance. Try to keep the main materials and finishes consistent throughout the pantry. Make sure the brackets, boards, and baskets are suitable for their intended loads rather than choosing them on appearance alone.
Pro Tip: Check the weight rating of the complete shelving setup, including its brackets and wall attachments, before storing heavy groceries.
16. Ladder-Style Shelves
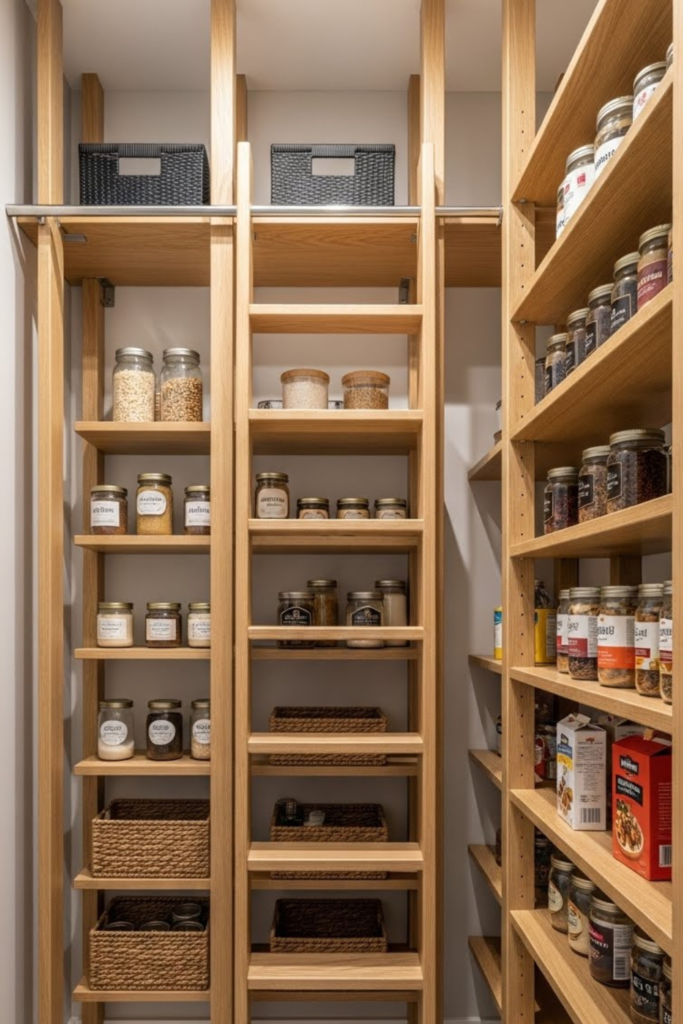
Ladder-style shelving uses vertical side rails and horizontal shelves to make use of a tall wall. It can fit a narrow pantry or an unused section of kitchen wall where a wide cabinet would take up too much room. Shallower shelves near the top and deeper shelves below can make the unit more practical.
Choose a stable design with secure joints and enough support for the items you plan to store. Heavier containers belong on lower shelves, while smaller jars and lightweight packets can go higher. If the unit is tall or narrow, secure it as recommended to prevent it from tipping.
Pro Tip: Check the stability of the empty unit first, and avoid putting heavy items on high shelves where they are difficult to reach safely.
17. Slide-Out Shelves
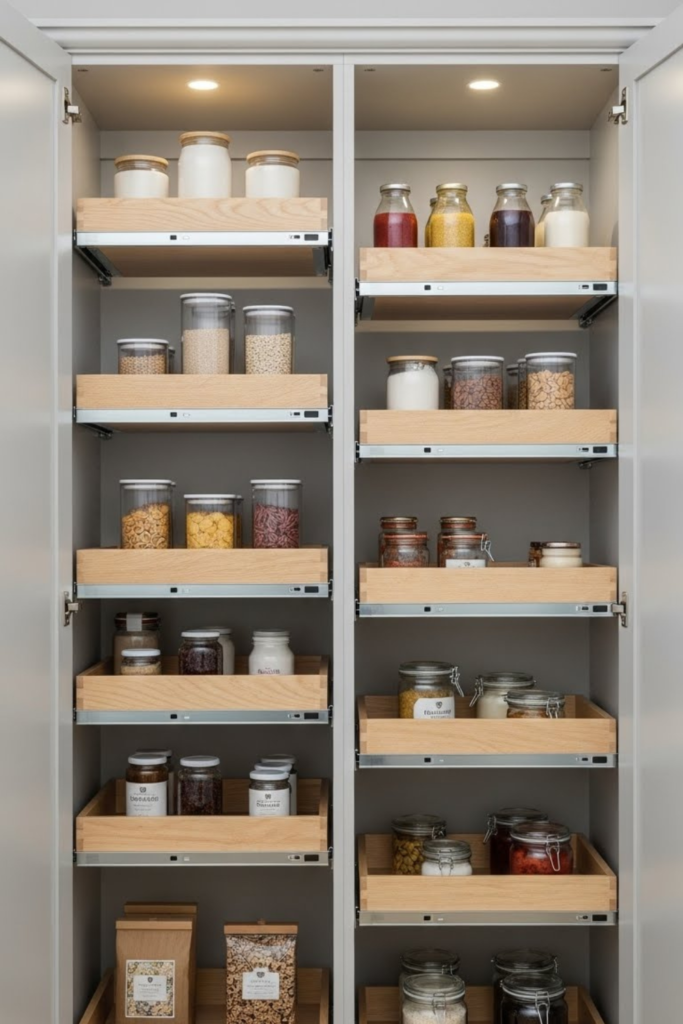
Slide-out shelves are useful for deep cupboards where cans and jars tend to get lost at the back. Shallow wooden trays attached to drawer slides let you bring the contents forward, making it easier to see what you have. They can be installed in lower pantry cabinets or other deep storage spaces.
Measure the cabinet’s internal width and depth before choosing the slides. Leave enough clearance for the trays to move without rubbing against the sides. Organize each tray by category so you can find baking supplies, canned food, or snacks without searching through mixed items.
Pro Tip: Test every tray while it is empty, then load it gradually to check that it moves smoothly under the intended weight.
18. Open Box Shelves
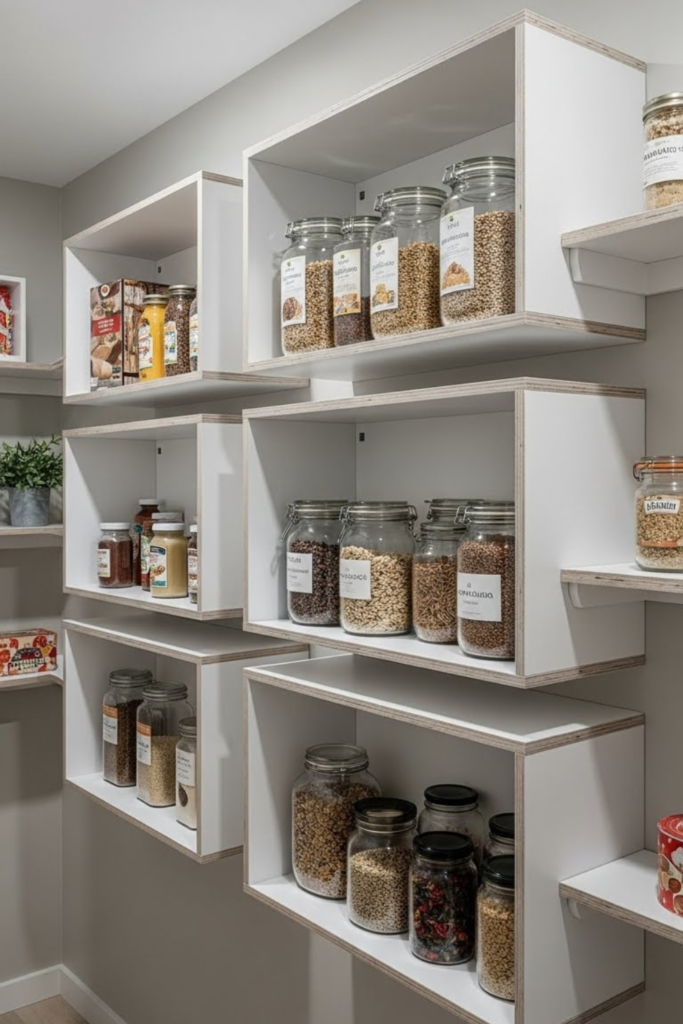
Open box shelves divide pantry storage into separate compartments. You can build simple cubbies from plywood and use each section for snacks, jars, baking ingredients, or small baskets. The sides help keep loose items grouped together and stop them from spreading across the entire shelf.
Plan the size of each compartment around the containers you already own. Small cubbies may work for packets and spice jars, while larger sections are better for baskets or bulky food packages. Secure the units properly, particularly if you plan to stack them or mount them on the wall.
Pro Tip: Measure your largest containers before building the cubbies, and leave enough room to remove them without catching on the sides.
19. Hanging Shelf Rails
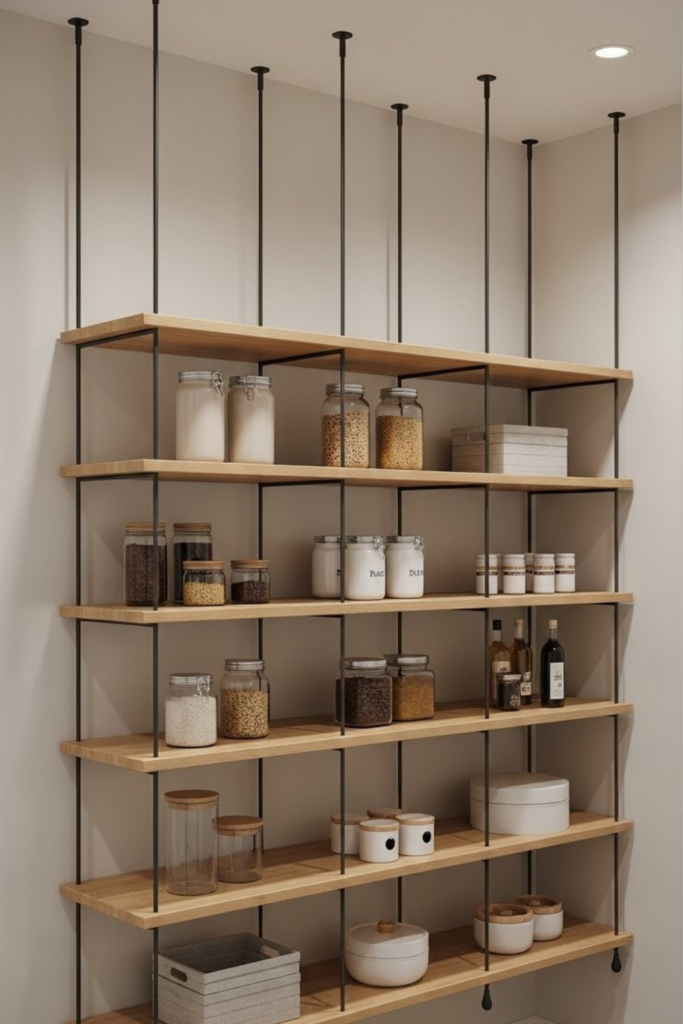
Hanging shelves suspend wooden boards from metal rods or suitable cables attached to a ceiling structure. They can free up floor space and create an open storage area in a compact pantry. The design is best for items that fall within the verified weight limit of the shelf and its attachments.
Installation needs careful planning because the ceiling supports carry the load. Don’t attach loaded shelves to an unsupported ceiling panel or use decorative hooks that aren’t rated for the job. Check the shelf spacing and make sure the suspended boards won’t swing into doors or interfere with normal movement around the pantry.
Pro Tip: Confirm the ceiling framing and weight capacity before installation, and use hardware designed for the complete load.
20. Pantry Shelf Dividers
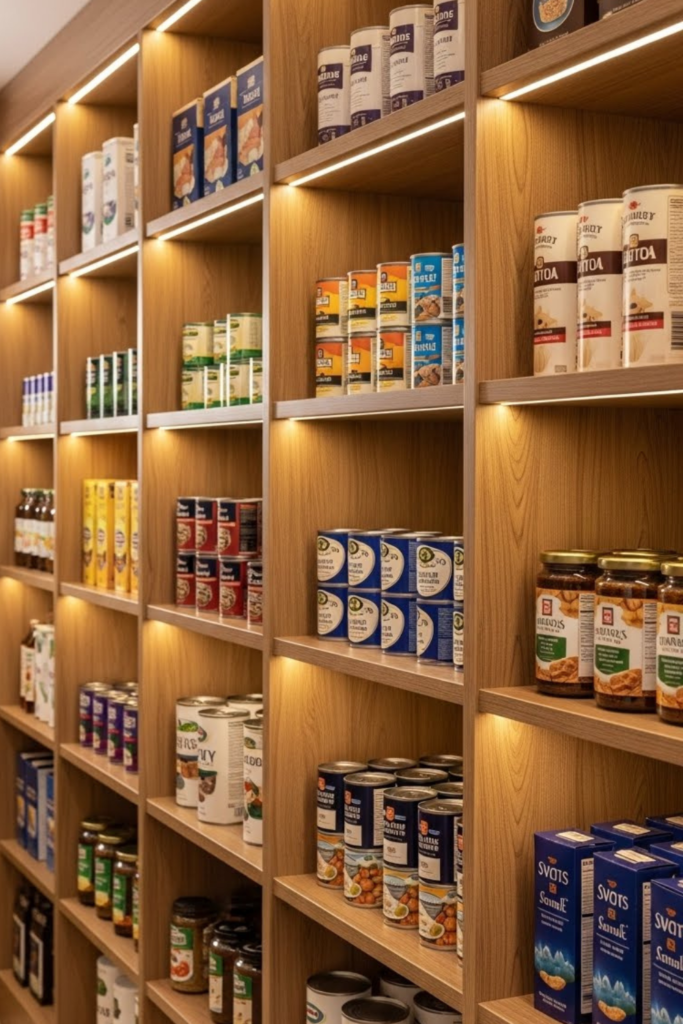
Shelf dividers help keep items upright and separate without requiring a full pantry renovation. Thin acrylic or plywood dividers can create sections for baking trays, cutting boards, food packets, and stacks of containers. They are especially useful when items tend to fall over or slide into neighboring piles.
Choose dividers that fit the shelf depth and can be wiped clean. Removable versions make it easier to rearrange the pantry later, while fixed dividers can provide more support for items that need to stand upright. Make sure the dividers don’t take up so much room that containers become difficult to remove.
Pro Tip: Position the dividers around the width of the items you store most often, leaving a little space for easy access.
21. Tiered Shelf Inserts
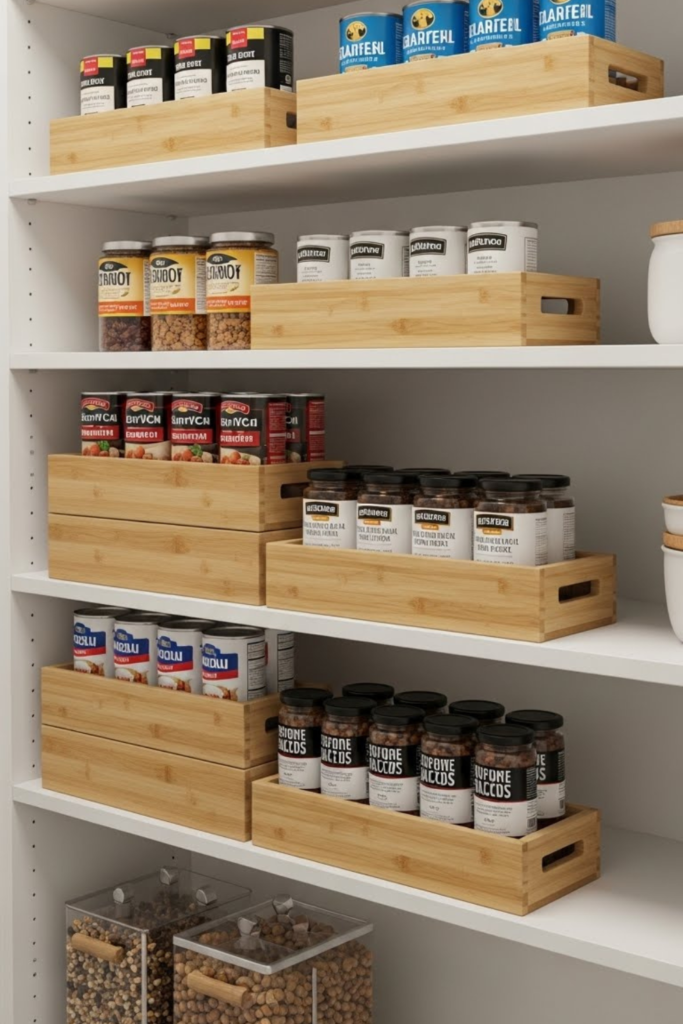
Tiered shelf inserts raise the back row of cans and jars, making their labels easier to see. You can buy ready-made risers or make simple stepped inserts from suitable wood. They are especially useful when your pantry has fixed shelves that cannot be adjusted to suit different container heights.
Measure the shelf depth and the clearance above it before choosing a riser. Arrange smaller jars and cans in rows so you can see what’s behind the front row. Keep the inserts stable and avoid placing heavy containers on a narrow or uneven surface.
Pro Tip: Check the height of the shelf above before adding a riser so you can still lift containers out comfortably.