


I’ve learned the hard way that makeup brushes don’t get damaged because they’re cheap—they get damaged because of poor storage. When brushes are tossed into drawers or bags, the bristles bend, lose shape, and collect dust or moisture. Once I switched to better storage methods, my brushes stayed cleaner, lasted longer, and performed better. In this guide, I’ll walk you through exactly how I protect my brushes and share 20 practical storage ideas you can actually use in real life.

Key Takeaways
Proper storage protects both the bristles and the glue inside your brushes, which directly impacts their lifespan.
Keeping brushes upright, dry, and separated prevents bending, fraying, and bacterial buildup.
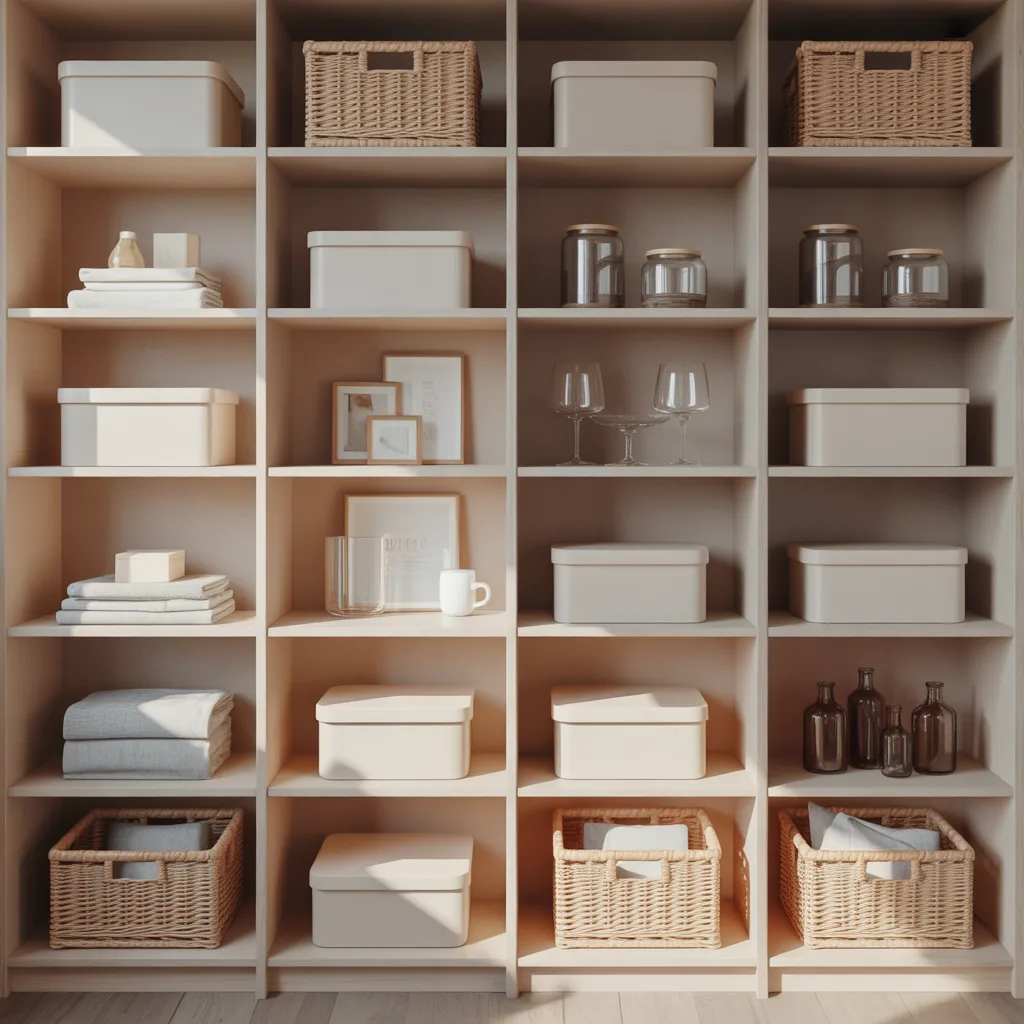
Closed containers are ideal for dusty or humid environments, while open storage works best in clean, dry spaces.
Travel requires structured cases or pouches to avoid pressure damage.
Simple organization systems often work better than complicated setups for daily use.
How Do I Protect Makeup Brushes From Damage in Drawers or Bags?
From my experience, protecting makeup brushes comes down to two simple things: keeping the bristles intact and preventing moisture damage. When brushes are crushed under heavy products or left damp, they start to lose their shape and durability much faster than expected. I’ve noticed that even high-quality brushes can wear out quickly if stored carelessly.
I always make sure my brushes are completely dry before putting them away because trapped moisture weakens the glue holding the bristles. Separating brushes so they don’t press against each other also makes a big difference in maintaining their shape. A little effort in organizing goes a long way in keeping them usable for years.
Pro tip: After washing, I let my brushes dry at a slight downward angle so water doesn’t seep into the handle and loosen the glue.
Zip Pouch Protection
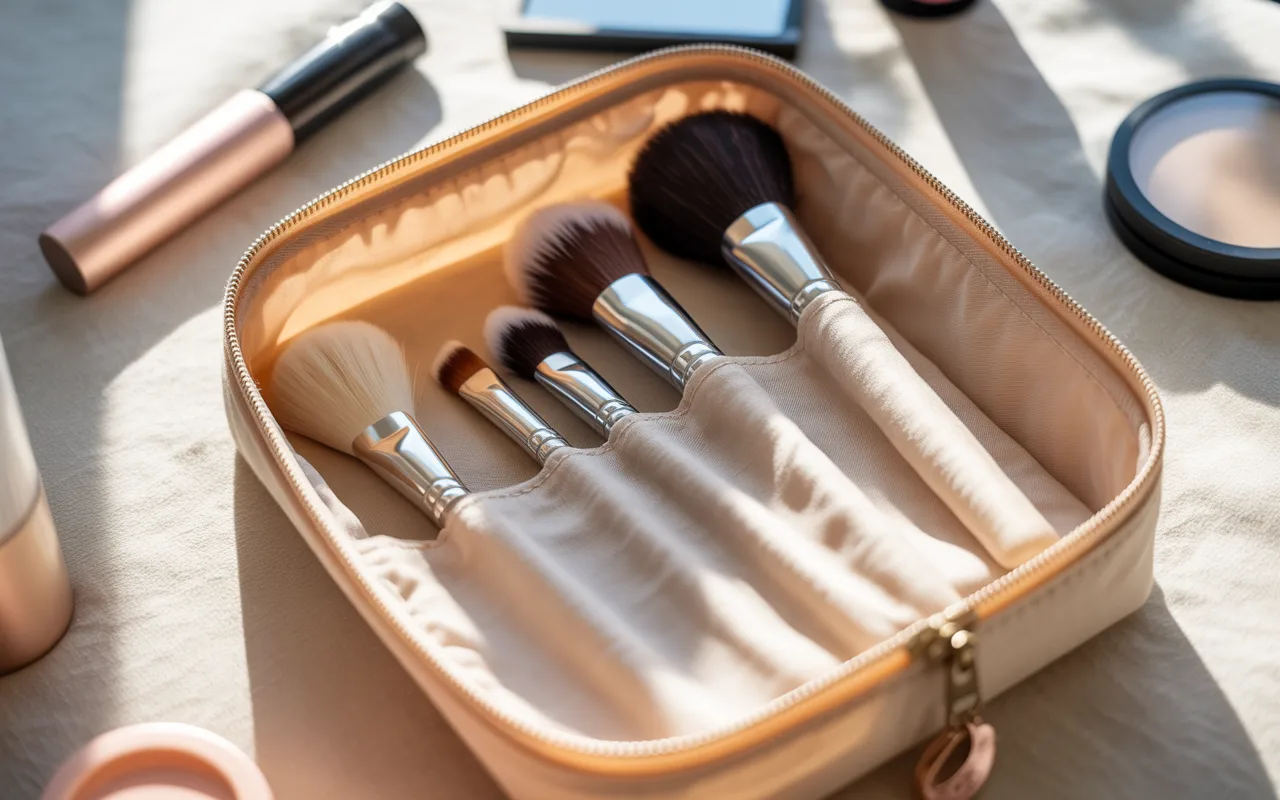
I used to toss my brushes into a makeup bag without thinking, but that quickly led to bent bristles and uneven shapes. Switching to a structured zip pouch helped me keep everything in place and protected from pressure. It’s a simple change that instantly improved how my brushes held up. This method works really well when I’m traveling light or heading out for the day. I always choose a pouch slightly longer than my biggest brush to avoid bending the tips. Making sure brushes are fully dry before sealing the pouch is something I never skip anymore.
Pro tip: Use a pouch with a slightly firm exterior instead of soft fabric to add an extra layer of protection during travel.
Decorative Jar Display
I like keeping my brushes upright because it naturally helps them maintain their shape. A decorative jar not only organizes them but also adds a nice visual touch to my vanity. It’s one of those solutions that feels both practical and aesthetic at the same time. To make it more functional, I sometimes add beads or rice at the bottom so the brushes stand properly. I also avoid overcrowding the jar because tight spacing can still damage the bristles. This setup works best for me when I want quick and easy access during daily routines.
Pro tip: Clean the jar weekly to prevent dust buildup at the base, which can transfer back onto your brushes.
Tiered Shelf System
When my counter started getting cluttered, I realized my brushes were constantly falling over and collecting dust. Adding a tiered shelf gave everything its own space and helped me keep brushes upright and separated. It also made my routine feel more organized and efficient. I usually place taller brushes on the top tier and keep heavier products below. This prevents accidental pressure on delicate bristles and keeps everything visible. It’s especially useful in smaller spaces where I need to maximize vertical storage.
Pro tip: Place your most-used brushes at eye level so you can grab them quickly without knocking others over.
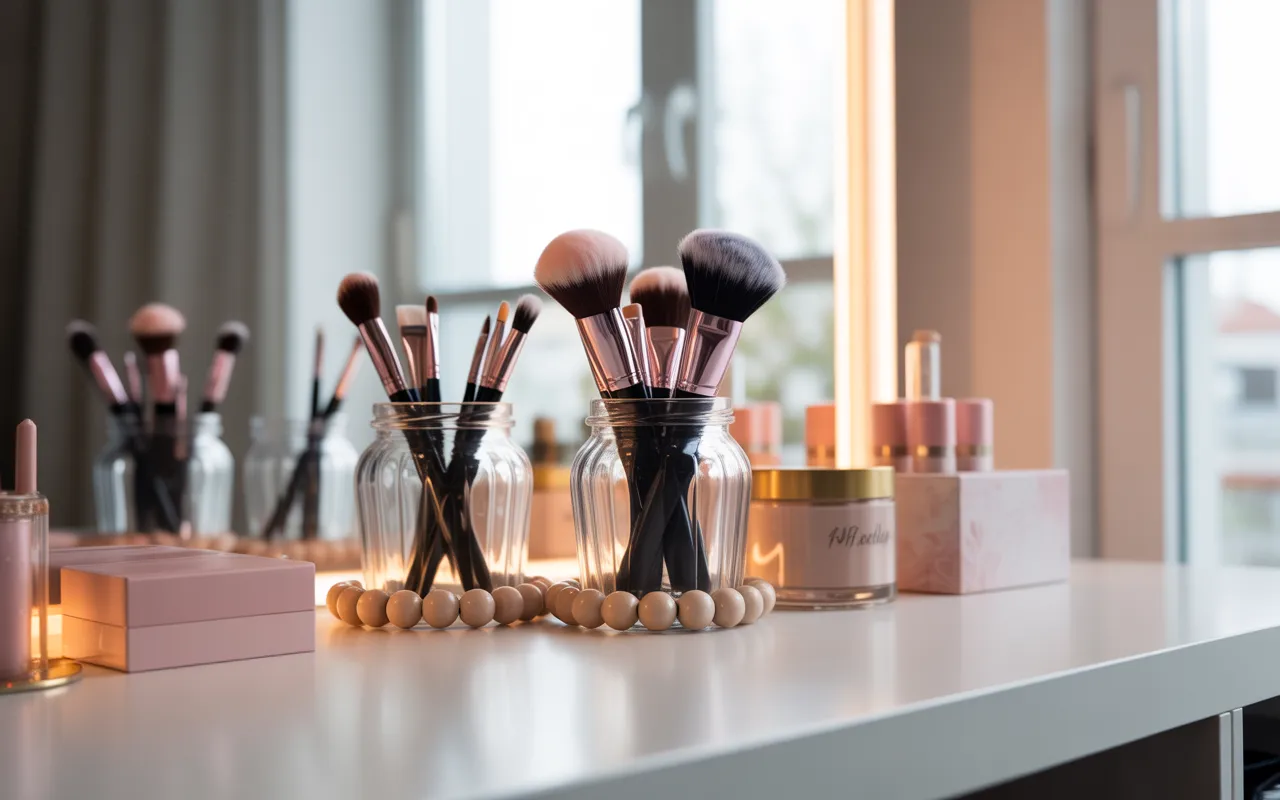
Glass Cup Organizers

I personally enjoy using glass cups because they keep everything visible and easy to grab. Open storage allows airflow, which helps brushes stay fresh and dry throughout the day. It’s a simple setup that fits well on most vanities or dressing tables. To avoid tipping, I always place the cups on a stable surface or tray. I also separate brushes from other products so they don’t rub against each other. This small adjustment keeps my brushes cleaner and better shaped over time.
Pro tip: Add a non-slip mat under the cups to prevent accidental falls, especially on smooth surfaces.
Dome Cover Organizer
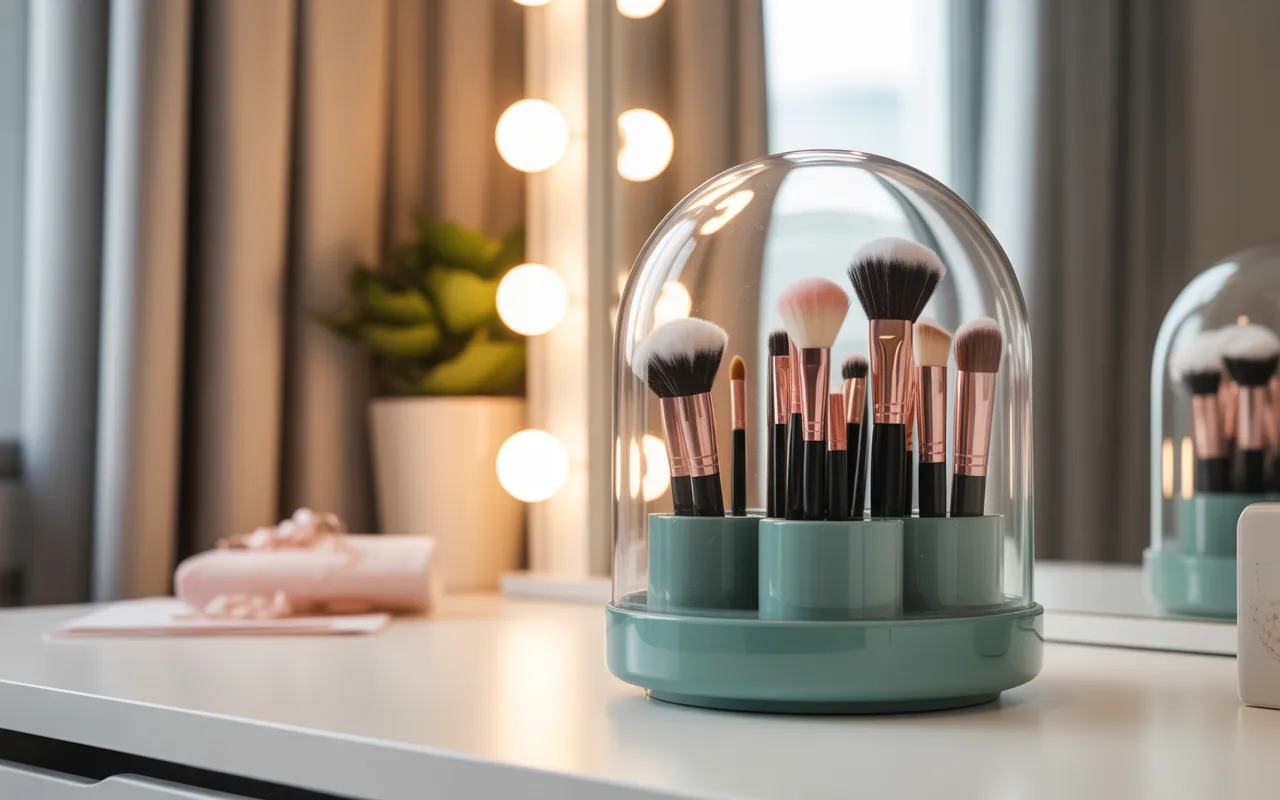
Dust used to be a constant issue for me, especially when my brushes sat out in the open. A dome cover organizer solved that by keeping everything protected while still letting me see what I have. It’s a great balance between visibility and protection. I prefer this option when my vanity is near a window or fan where dust moves around easily. Having a covered top ensures the bristles stay clean without extra effort. It also keeps the setup looking neat and intentional.
Pro tip: Wipe the inside of the dome every few days to avoid trapped dust settling back onto the brushes.
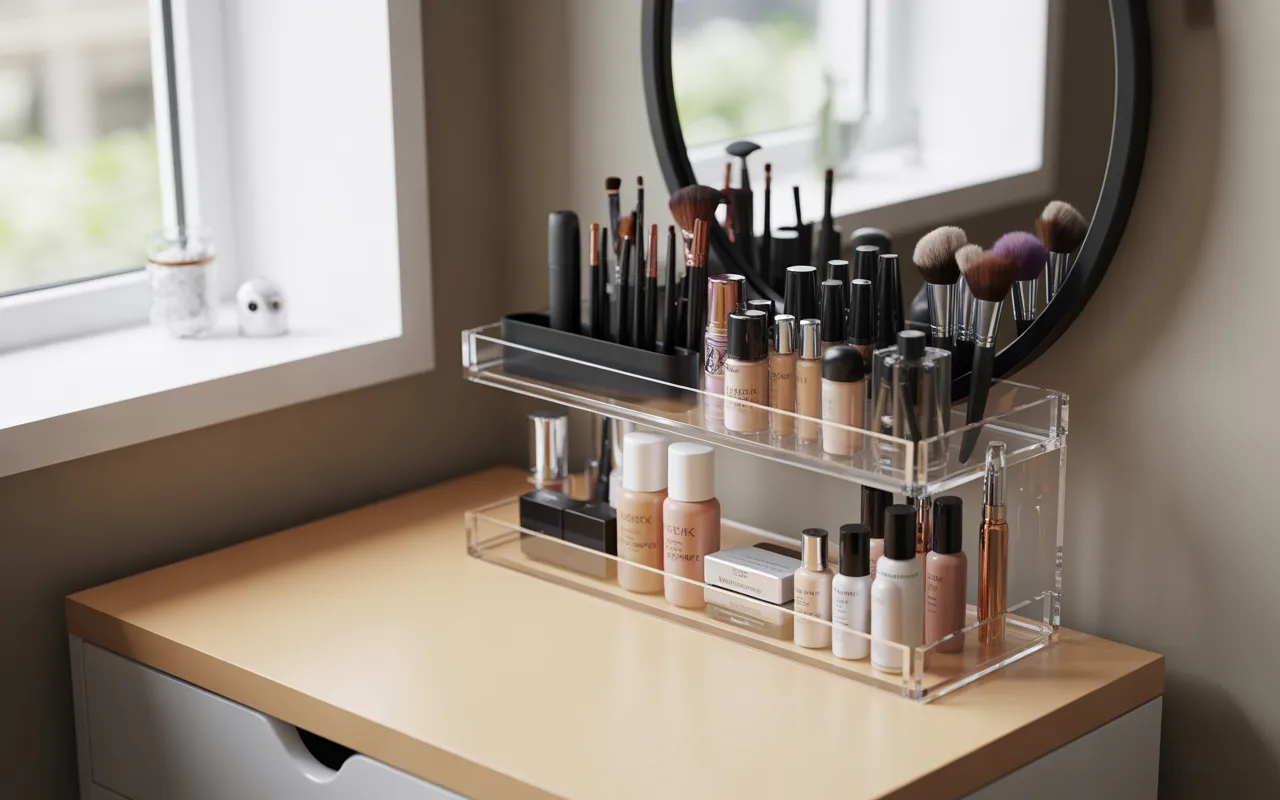
Clear Lid Storage
I’ve found that clear lid containers are perfect when I want to protect brushes without hiding them. They keep dust away while still making it easy to locate specific tools. This makes my routine faster since everything is visible at a glance. The key here is making sure brushes are fully dry before closing the lid. I also look for containers with dividers so brushes don’t lean into each other. That extra spacing helps maintain their original shape.
Pro tip: Open the lid occasionally to allow airflow and prevent any trapped moisture buildup.
Luxury Dome Display
For higher-end brushes, I like using storage that feels just as premium. A luxury dome display keeps everything upright, clean, and separated while adding a polished look to my setup. It’s both protective and visually appealing. I usually place it near my mirror for easy access but away from humidity. The enclosed design prevents dust buildup and keeps brushes in top condition. It’s a worthwhile upgrade if you’ve invested in quality tools.
Pro tip: Rotate brushes occasionally so they don’t stay in one position for too long, helping maintain even shape.
Divided Cup Holder
When I kept all my brushes in one container, they constantly pressed against each other and lost their shape. Switching to a divided cup holder made a noticeable difference. It allowed me to organize brushes by type and keep them spaced properly. I now separate face brushes from eye brushes, which makes my routine smoother. It also prevents larger brushes from damaging smaller ones. This method works really well for everyday use.
Pro tip: Label sections if needed so you always return brushes to the correct spot and maintain organization.
Rotating Brush Tower
I used to waste time digging through crowded containers to find the right brush. A rotating brush tower changed that by giving me quick access with just a spin. It also keeps brushes upright and evenly spaced. This setup is ideal for small vanities because it saves space while improving accessibility. I especially like covered versions since they add protection from dust. It’s one of the most efficient systems I’ve tried.
Pro tip: Avoid overloading one side to keep the rotation smooth and balanced.
Covered Cubby Station
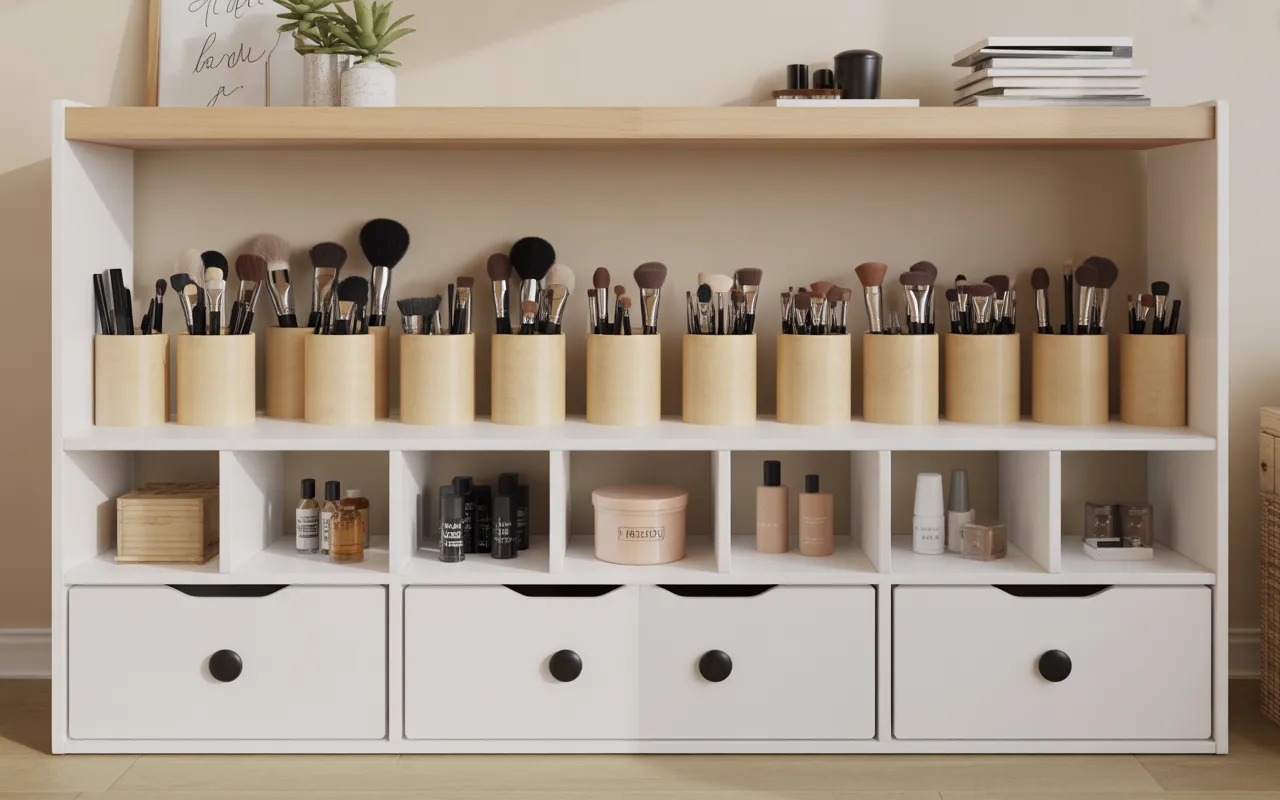
In shared spaces, I noticed my brushes collected dust and debris more quickly. A covered cubby station helped solve that by keeping them enclosed and organized. It also gave me extra storage for heavier items in the drawers below. I like how this setup separates delicate brushes from bulky products. The added structure keeps everything in place and reduces clutter. It’s a practical option for busy or shared environments.
Pro tip: Assign each section a purpose so items don’t get mixed and create unnecessary pressure on brushes.
Minimal Dome Holder
Sometimes I prefer a clean and simple look, and a minimal dome holder fits perfectly. It keeps brushes protected without making the space feel crowded. I find it especially useful for smaller vanities or bedrooms. The removable cover makes it easy to access brushes while still offering protection. I also make sure there’s enough spacing inside so nothing presses together. This keeps everything looking neat and well-maintained.
Pro tip: Choose a slightly tinted dome to reduce visible dust and keep the setup looking cleaner longer.
Brush Set Organization
When I had too many brushes in one place, they quickly lost their shape and became hard to manage. Organizing them by type made a huge difference in both storage and usability. It also helped me see which brushes I actually use daily. I usually assign separate holders for face, eye, and detail brushes. This prevents unnecessary contact between different sizes and shapes. It’s a great method if you have a larger collection.
Pro tip: Declutter regularly and remove brushes you don’t use to prevent overcrowding.
Drawer Base Organizer
I used to rely on drawers, but without structure, they became messy fast. Adding a drawer base organizer allowed me to keep brushes upright and properly separated. It made the space much more functional. Now I store smaller tools in the lower section and keep brushes on top. This prevents heavy items from pressing down on them. It’s a simple upgrade that improves both storage and longevity.
Pro tip: Use adjustable dividers so you can customize sections as your collection changes.
Sectioned Round Holder
I’ve noticed that crowded containers always lead to flattened bristles over time. A sectioned round holder fixes that by giving each brush category its own space. It keeps everything organized without taking up too much room. I usually place taller brushes at the back and smaller ones in front. This keeps the setup balanced and easy to use. It’s a great option for compact spaces.
Pro tip: Keep similar brush sizes together to prevent uneven pressure inside each section.
Zipped Brush Case

For travel, I never rely on loose storage anymore. A zipped brush case with elastic slots keeps each brush secured and protected. It prevents movement and reduces the risk of damage. I always clean and dry my brushes before placing them inside. This avoids moisture buildup and keeps them hygienic. It’s a must-have for anyone who travels frequently.
Pro tip: Choose a case with a flap cover over the bristles for extra protection against friction.
Leather Travel Cylinder
When I need extra protection, I go for a travel cylinder. The sturdy outer shell prevents pressure damage while keeping brushes upright. It’s especially useful for longer trips or professional kits. I make sure the case fits my longest brush without forcing it inside. This avoids bending the bristles at the tips. It’s a reliable option for serious makeup users.
Pro tip: Line the inside with a soft cloth insert to reduce friction and keep brushes scratch-free.
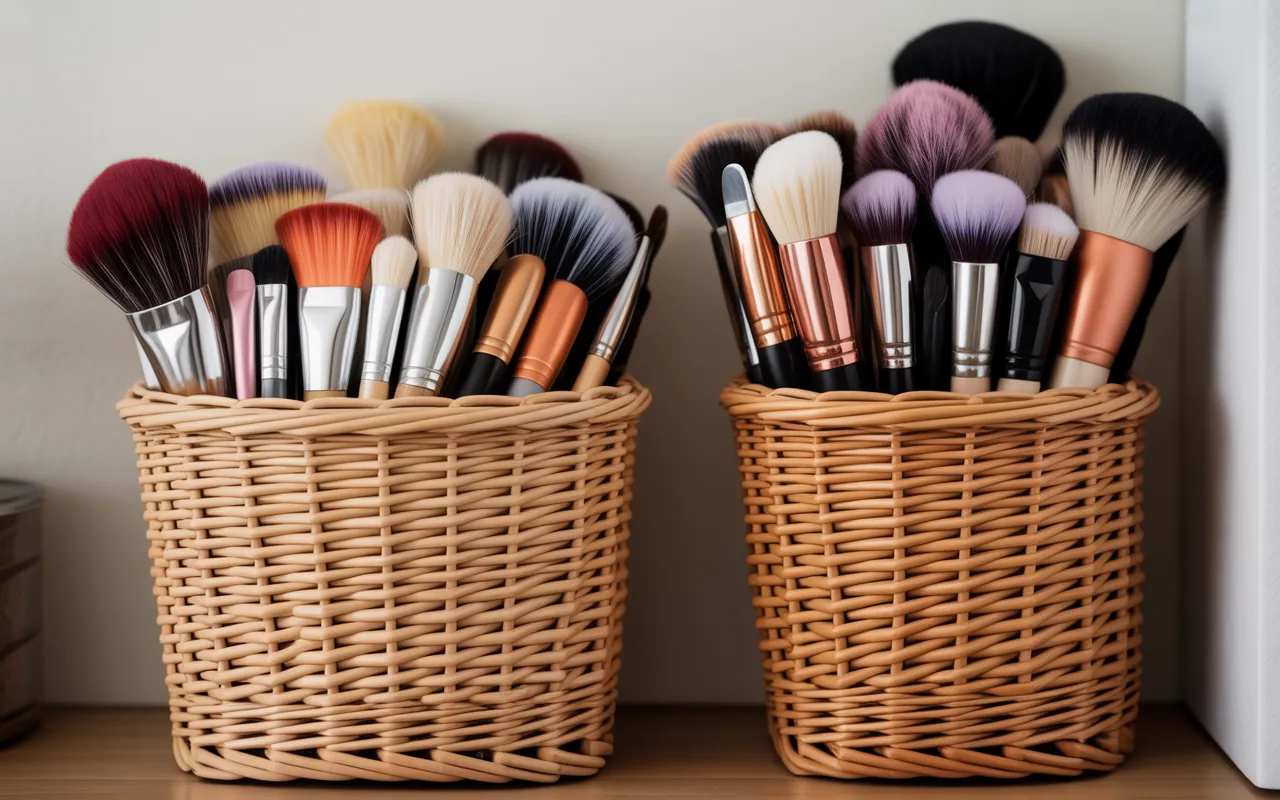
Dual Cup Display
Sometimes the simplest solutions work best, and that’s the case with dual cup storage. Splitting brushes into two containers prevents overcrowding and keeps them better organized. It also looks clean and balanced. I usually dedicate one cup to daily essentials and the other to less-used tools. This keeps my routine efficient without overloading one space. It’s both practical and visually pleasing.
Pro tip: Place both cups on a tray to keep them stable and visually grouped together.
Tall Glass Dome
In brighter rooms, I noticed dust builds up faster than expected. A tall glass dome creates a sealed environment that protects brushes while still displaying them. It’s both functional and decorative. The added height also prevents larger brushes from bending. I find this especially useful for maintaining the shape of fluffy brushes. It’s a great combination of style and protection.
Pro tip: Position the dome away from direct sunlight to prevent heat buildup inside.
Beaded Glass Holder
I like using beads inside a glass holder because they help keep brushes stable. Without support, brushes tend to wobble and lean into each other. This small addition makes a big difference in maintaining their shape. I usually use acrylic beads or small stones for this setup. It keeps everything upright and evenly spaced. It’s an easy DIY-style solution that works surprisingly well.
Pro tip: Wash the beads occasionally to prevent dust and product residue buildup.
Basket Style Holders
Basket-style holders are great when I want something simple and structured. They keep brushes upright and prevent them from leaning too much. I also like how they fit neatly against walls or corners. I make sure not to overfill them because that can still damage the bristles. Keeping them on a stable surface away from moisture helps maintain cleanliness. It’s a practical option for everyday storage.
Pro tip: Use baskets with a solid inner lining so bristles don’t catch or snag on woven material.
FAQs
1. Can I Store Makeup Brushes Lying Flat in a Drawer?
I’ve tried storing brushes flat, and it can work if they’re properly separated. The problem starts when they roll around or get pressed under heavier items, which damages the bristles over time. Using dividers or compartments helps prevent this issue. I also make sure brushes are completely dry before placing them in a drawer. Moisture can weaken the glue and shorten their lifespan. With the right setup, flat storage can still be effective.
2. Is It Safe to Store Brushes in the Bathroom?
From my experience, humidity is the biggest concern when storing brushes in the bathroom. Steam from showers can settle into the bristles and slowly damage them. Over time, this can affect both performance and durability. If I have to keep brushes in the bathroom, I use a covered organizer and place it away from direct steam. Otherwise, I prefer storing them in a bedroom or dry area. Keeping them dry is always the priority.
Conclusion
Over time, I’ve realized that taking care of makeup brushes isn’t complicated—it just comes down to storing them the right way. When I started keeping my brushes clean, dry, and properly spaced, I noticed they lasted longer and performed much better. Even small changes, like switching to a covered container or using dividers, made a noticeable difference. What works best really depends on your space and routine, but the goal is always the same: protect the bristles and avoid unnecessary pressure or moisture. I like to keep things simple and functional so I actually stick to the system. Once you find a setup that fits your lifestyle, maintaining your brushes becomes effortless.