
If your kitchen cabinets feel chaotic every time you reach for a lid, I’ve been there too. Pot lids are awkward, slippery, and somehow always louder than they should be. The good news is that once you build a simple system that fits your space, the mess stops coming back.
I’ve learned that pot lid organization isn’t about buying random organizers, it’s about creating a system that matches how you cook daily. When lids are stored vertically, spaced properly, and placed where you naturally reach, everything becomes easier. In this guide, I’m sharing 12 practical pot lid storage ideas that actually work long-term without constant rearranging.
Key Takeaways
- Vertical storage keeps lids stable and easy to grab
- Avoid stacking lids if you want long-term organization
- Measure your space before buying any organizer
- Store frequently used lids at eye level or within easy reach
- Use cabinet doors, drawers, or narrow gaps for hidden storage
- Keep heavier glass lids in lower, more stable positions
How Can I Create a Pot Lid Storage System That Stays Organized Long-Term?
From my experience, the biggest mistake people make is setting up storage that looks good but doesn’t match how they actually cook. If your system doesn’t align with your daily habits, it will fall apart within days. I always start by deciding where lids should live, inside cabinets, drawers, or even on walls. Next, I measure everything carefully before installing or buying anything. This step alone prevents most frustration later. Once I switched to vertical storage, I noticed an immediate difference because lids stopped sliding and became easy to grab.
I also make it a rule to keep everyday lids within arm’s reach and move occasional ones higher or deeper. Stacking might seem convenient, but it always leads back to clutter. A simple vertical setup is what truly keeps things organized over time.
Pro Tip: Before committing to any setup, test your layout by placing lids temporarily in the space to see if it feels natural during cooking.
Adjustable Cabinet Racks
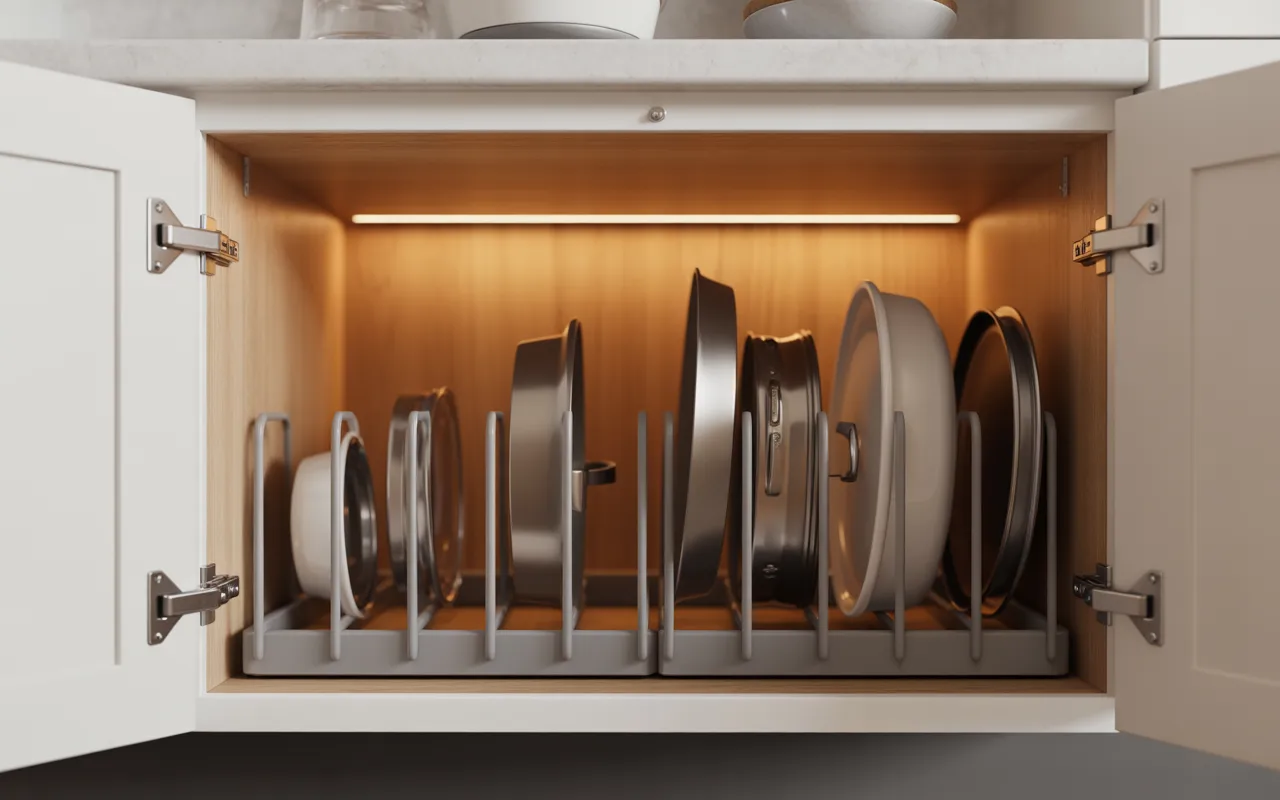
I noticed a huge improvement when I stopped stacking lids and started placing them upright in adjustable racks. Each lid gets its own slot, which instantly removes the clutter and noise. It also makes everything easier to see at a glance. These racks work best in standard lower cabinets where there’s enough depth but no structure. I always measure the cabinet width first so the dividers fit perfectly without wasting space. Adjustable spacing lets me handle both small and large lids easily.
The overall look becomes cleaner too, especially when everything is aligned vertically. It gives the cabinet a more structured and intentional feel instead of looking like a random pile.
Pro Tip: Choose non-slip base racks or add shelf liners underneath to prevent the organizer from shifting when pulling lids out.
Pull-Out Peg Panel
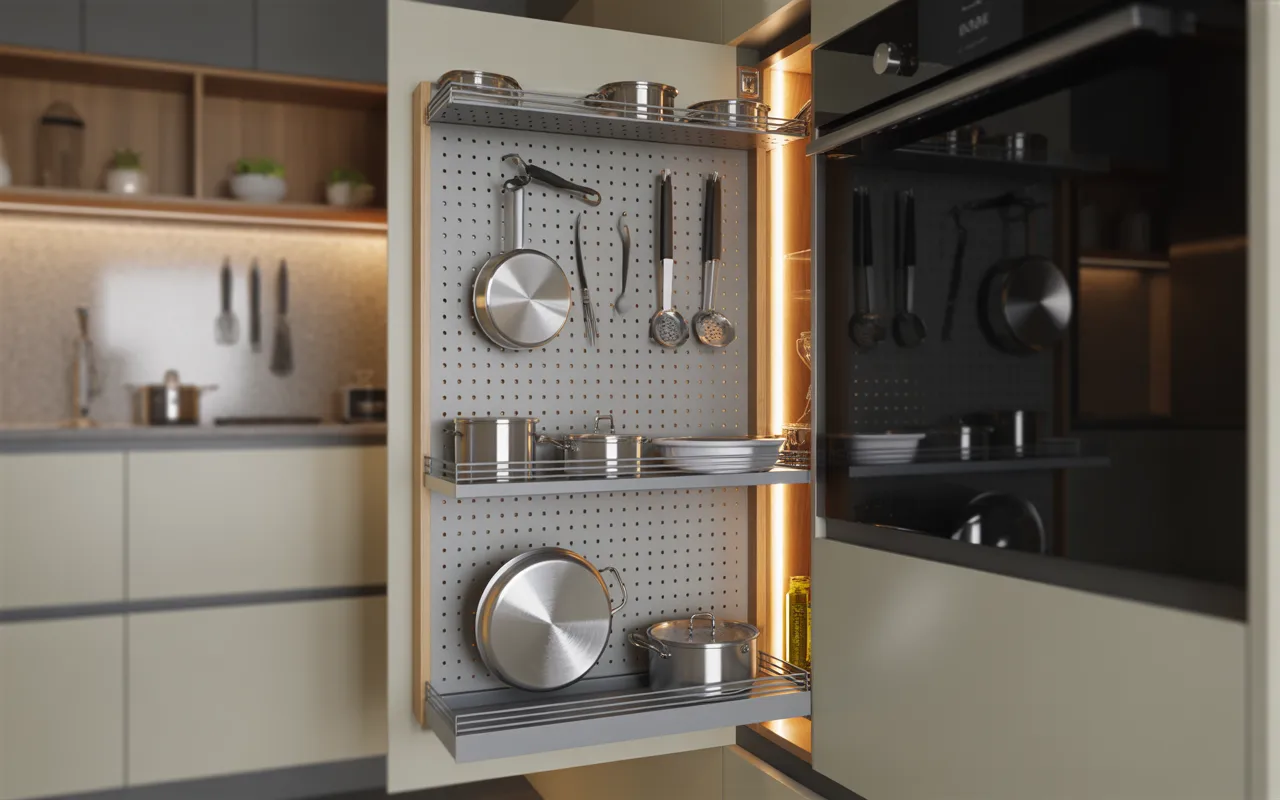
One of my favorite upgrades has been using a pull-out peg panel in narrow spaces. Areas that used to feel useless suddenly become highly functional. I’ve seen this work especially well beside the stove or refrigerator. By installing a sliding frame with adjustable pegs, I can hang both pots and lids in one place. It keeps everything separated, so nothing bumps into each other. That small change makes daily cooking smoother and less frustrating.
The best part is the accessibility. I just pull the panel out and everything is right in front of me, no digging or rearranging required.
Pro Tip: Use rubber-coated pegs or add small silicone caps to avoid scratching glass lids over time.
Cabinet Door Mount
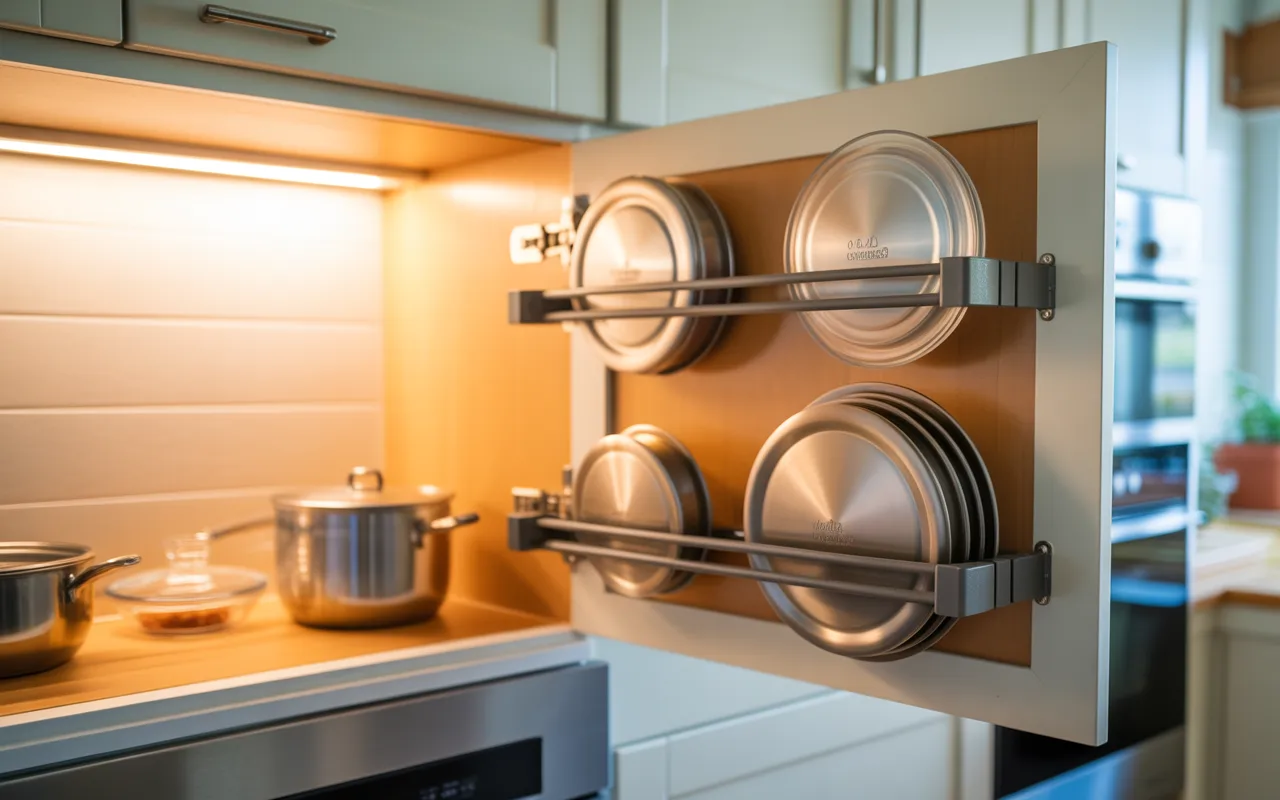
Using the inside of cabinet doors completely changed how I use my kitchen space. I realized that this area is often ignored, even though it’s perfect for lightweight storage like lids. Once I added holders, the clutter inside the cabinet dropped instantly. I make sure to space the holders based on lid size so nothing overlaps or scratches. Heavier lids always go toward the bottom to protect the hinges and keep everything balanced. This small detail really matters over time.
Now every lid is visible the moment I open the cabinet. It feels more organized and saves time during cooking.
Pro Tip: Always check hinge strength and tighten screws regularly to prevent sagging from lid weight.
Dual-Zone Storage
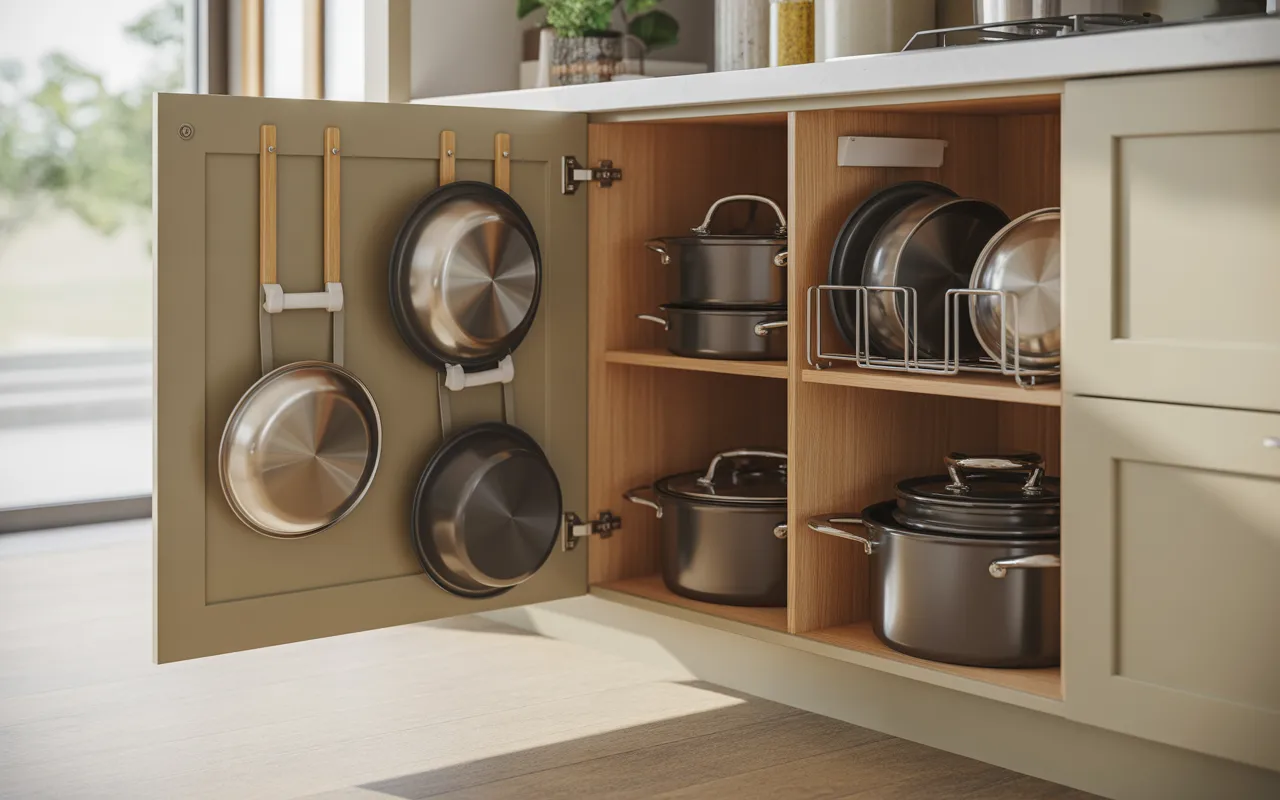
Separating lids and pots into different zones made my kitchen feel more efficient. I use the cabinet door for slimmer lids and keep larger ones upright inside the cabinet. This way, everything has its own place without wasting space. This setup works best in deeper cabinets where you have room to divide sections. I always check door clearance before installing anything to avoid dents or pressure marks later. Planning ahead saves a lot of hassle.
With this system, I don’t have to move pots around just to find a lid. Everything stays accessible and stable during daily use.
Pro Tip: Add soft bumpers on cabinet doors to avoid marks when mounted lid holders come into contact with shelves.
Countertop Display Stand
In smaller kitchens, I’ve found countertop stands surprisingly helpful. I keep the lids I use most often right next to the stove, which saves time when cooking multiple dishes. It’s a simple setup but very effective. I always position the stand away from direct heat to avoid damage. The front slot holds a lid while the back can double as space for a cutting board. It’s a smart way to maximize limited space.
Another benefit is airflow. Lids dry faster when left out, which helps prevent moisture buildup inside cabinets.
Pro Tip: Place a small absorbent mat under the stand to catch water drips and keep your countertop clean.
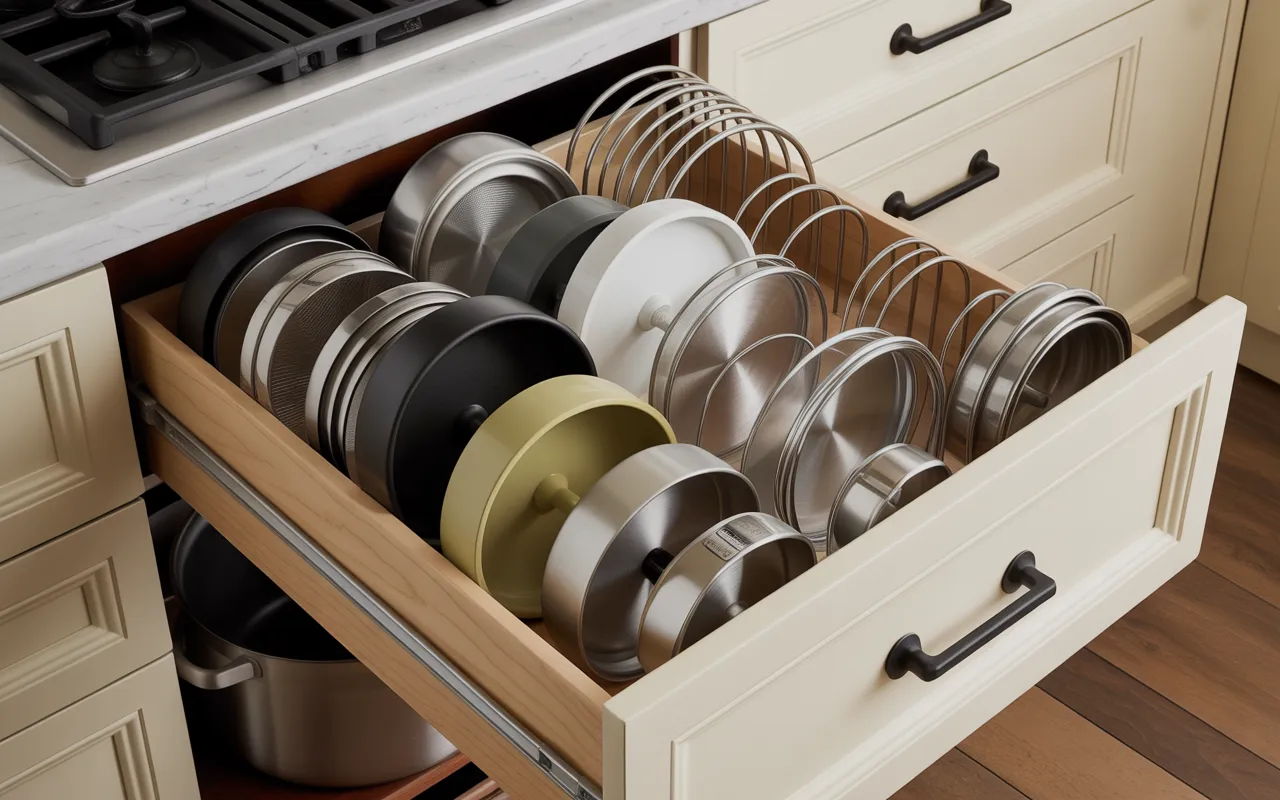
Deep Drawer Filing
Switching to vertical filing inside deep drawers made a huge difference for me. Instead of stacking lids, I line them up like books, which keeps everything visible and easy to grab. It’s one of the most satisfying setups. I always check drawer height first to make sure handles don’t hit the top when closing. Larger lids go toward the back while smaller ones stay in front for quick access. This simple arrangement saves time every day.
Now I can grab one lid without disturbing the rest. It keeps the drawer neat without constant adjustments.
Pro Tip: Use adjustable tension dividers if you don’t want to drill or permanently install anything in your drawers.
Vertical Door Rack
Installing a vertical rack on cabinet doors helped me use space I didn’t even realize I had. These slim racks are perfect for organizing lids without taking up shelf space. It’s a simple but effective solution. I prefer securing them with screws for stability, especially when storing heavier glass lids. Arranging larger lids at the bottom keeps the weight balanced and protects the hinges.
This setup makes everything easy to reach. I can slide a lid out quickly without knocking others over.
Pro Tip: Avoid overloading one side of the door to prevent long-term misalignment of cabinet hinges.
Heavy-Duty Drawer Rack
For heavier lids, I rely on strong drawer racks that can handle the weight without bending. This setup works best in wide drawers near the cooking area. It keeps everything within reach while I’m preparing meals. I always check the drawer depth before buying a rack to ensure a proper fit. Placing the rack on one side leaves room for pots or containers, which makes the drawer more functional overall.
Each lid stands independently, so there’s no clattering or shifting. It keeps the drawer looking clean and controlled.
Pro Tip: Choose rust-resistant metal racks if your lids are often slightly damp after washing.
Top Shelf Slot
Creating a slot above pots inside a drawer is one of the smartest solutions I’ve tried. It allows lids to sit separately without taking up extra space. Everything feels more organized instantly. I usually add a slim wooden strip or divider to create the slot. The spacing needs to be just right so lids slide in easily without stacking. This small detail makes a big difference.
With this setup, pots stay at the bottom while lids rest securely above. It’s a neat, layered approach that works especially well in deep drawers.
Pro Tip: Sand and smooth any DIY wooden edges to prevent scratching delicate glass lids.
Mixed Drawer Zones
When I want everything in one place, I use mixed drawer zones. One side holds lids vertically, while the other stores stacked pots. It keeps things organized without separating them into different cabinets. I adjust the dividers based on lid size so everything fits properly. Larger lids go toward the back, and smaller ones stay in front for quick access. This keeps the flow natural while cooking.
This setup feels efficient because I don’t need to move around the kitchen to find matching pieces. Everything is within reach.
Pro Tip: Label sections lightly or use visual grouping to maintain the system long-term, especially in shared kitchens.
Slim Divider Rack
Even shallow drawers can work if you use slim divider racks. I place the rack along one side and adjust the spacing based on lid size. It’s a compact solution that still keeps everything organized. Heavier lids go toward the back for better balance, while lighter ones stay in front. This prevents tipping and keeps the drawer stable during use. Small adjustments like this make a big difference.
Now even smaller storage spaces feel useful instead of cluttered. It proves that you don’t need a big kitchen to stay organized.
Pro Tip: Choose low-profile racks to ensure drawers close smoothly without hitting lid handles.
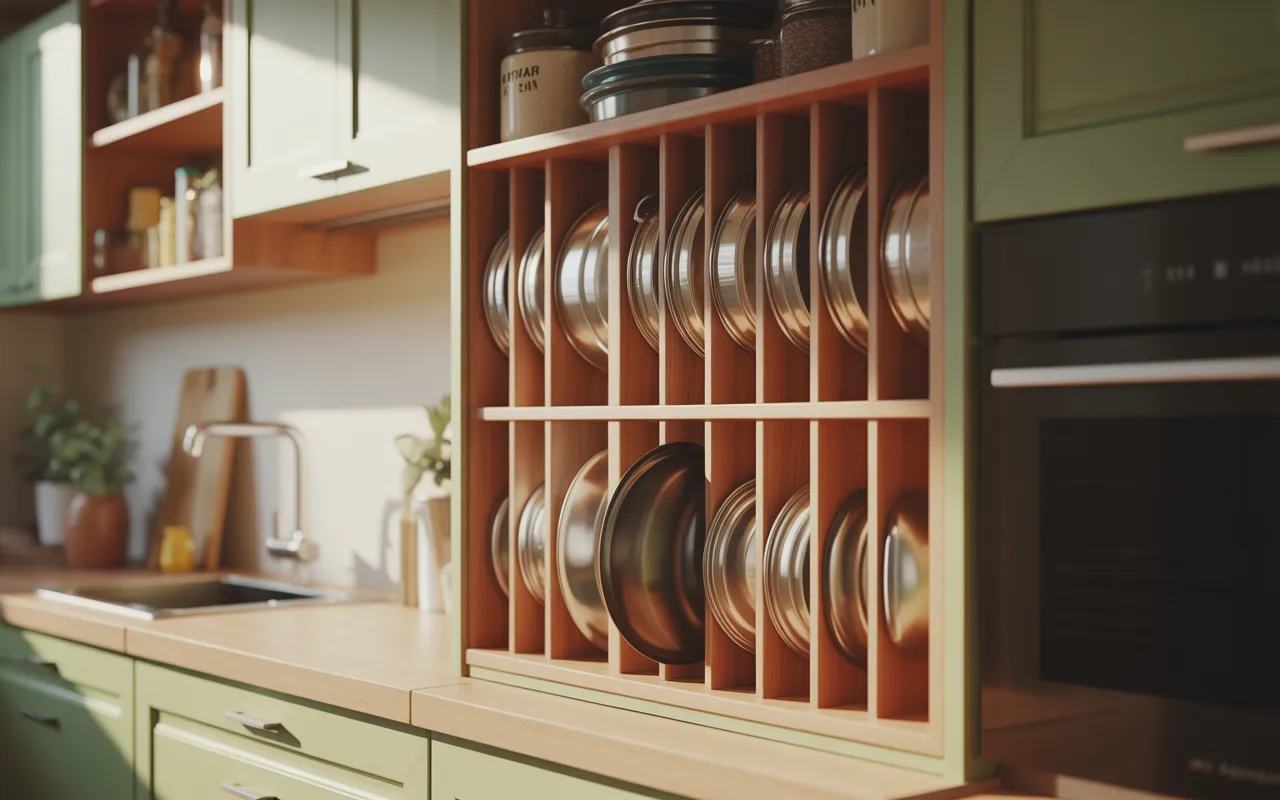
Wooden Slot Holders

Wooden slot holders are one of my favorite options for a clean and natural look. I use them on open shelves or inside upper cabinets where I want both structure and style. They instantly make the space feel more organized. I often place two holders side by side to separate lids by size or usage. Each lid slides into its own slot, which prevents scratches and keeps everything upright. Airflow also helps keep them dry.
This setup pairs well with stacked pots below, creating a balanced system. It’s both practical and visually pleasing in everyday use.
Pro Tip: Apply a water-resistant finish to wooden holders to extend their lifespan in humid kitchen environments.
FAQs
1. Should You Store Lids With Pots?
I’ve tried storing lids directly on pots, and it usually leads to frustration. Every time I pull one pot out, the lid shifts or falls, which creates unnecessary mess and noise.
Instead, I keep pots stacked together and store lids separately in a vertical system. This approach keeps everything stable and easier to manage daily. Even in small kitchens, separating them into zones works much better.
2. What’s the Best Way to Store Glass Lids Safely?
Glass lids need extra care because they scratch and chip easily. I always store them upright with proper spacing so the edges don’t rub against each other. This simple habit prevents damage over time.
I also avoid overcrowding the storage area. Heavier glass lids go toward the back or lower sections to keep everything balanced. A stable vertical slot keeps them safe and easy to access.
Conclusion
After trying different setups over time, I’ve realized that pot lid organization doesn’t need to be complicated to work well. The key is choosing one method that fits your kitchen layout and sticking with it instead of constantly switching systems. Once everything has a fixed place, the daily mess naturally disappears. What made the biggest difference for me was switching to vertical storage and keeping lids separated instead of stacked. It saves time, reduces noise, and makes cooking feel more efficient. Even small changes, like using a cabinet door or drawer divider, can completely transform how your kitchen functions.
If you’re just getting started, pick one idea from this list and test it in your space. You don’t need a full kitchen overhaul to see results. A simple, well-planned system is all it takes to keep your pot lids organized long-term.