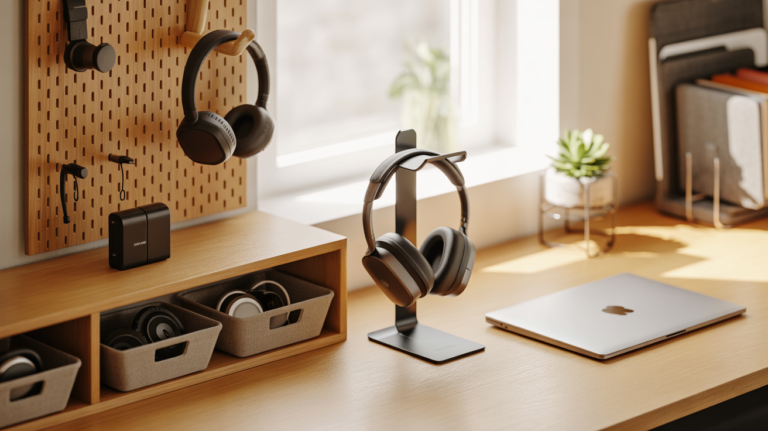


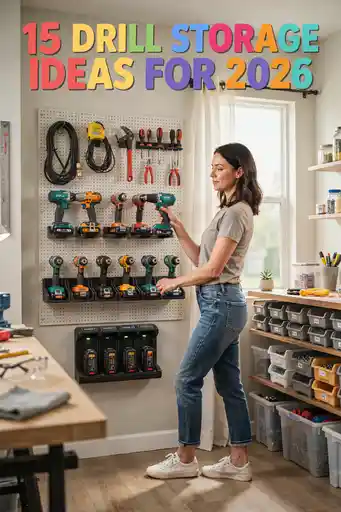
If your garage or workshop feels messy every time you look for a drill, you’re not alone. I’ve dealt with the same frustration—cords tangled, batteries misplaced, and bits nowhere to be found when I actually needed them. The problem usually isn’t the tools, it’s the lack of a proper system. In this guide, I’ll walk you through practical ways I’ve used to organize multiple drills without clutter. These ideas are simple, functional, and designed to save you time every single day.
If you own multiple drills, proper storage is essential to avoid clutter and wasted time. I’ve found that giving each tool, battery, and accessory a dedicated space makes everything easier to manage. Whether you use wall-mounted racks, cabinets, or compact stations, the right setup keeps your workspace clean and efficient. In this article, you’ll discover 15 smart drill storage ideas that help you stay organized and work faster.
Key Takeaways
- Assign a fixed space for each drill, battery, and accessory
- Wall-mounted storage saves valuable bench space
- Charging stations prevent dead batteries during work
- Vertical storage maximizes limited space
- Proper lighting improves visibility and efficiency
- Custom setups work better than generic storage solutions
- Always mount securely into studs for safety
How Do You Store Multiple Drills Without Clutter?
When I started organizing my drills, I realized quickly that treating them like regular tools doesn’t work. Drills are bulky, batteries are heavy, and chargers come with messy cords. If everything is thrown together, it turns into chaos fast. What worked for me was creating a system where every item had its own place. I use vertical storage for drills, dedicated shelves for batteries, and a fixed charging zone to keep everything powered. This setup saves time and reduces frustration.
The biggest difference comes from consistency. Once you assign a spot for each item and stick to it, your workspace stays clean without constant effort.
Pro Tip: I always test my layout with one drill first before building the full setup to make sure spacing and accessibility feel right.
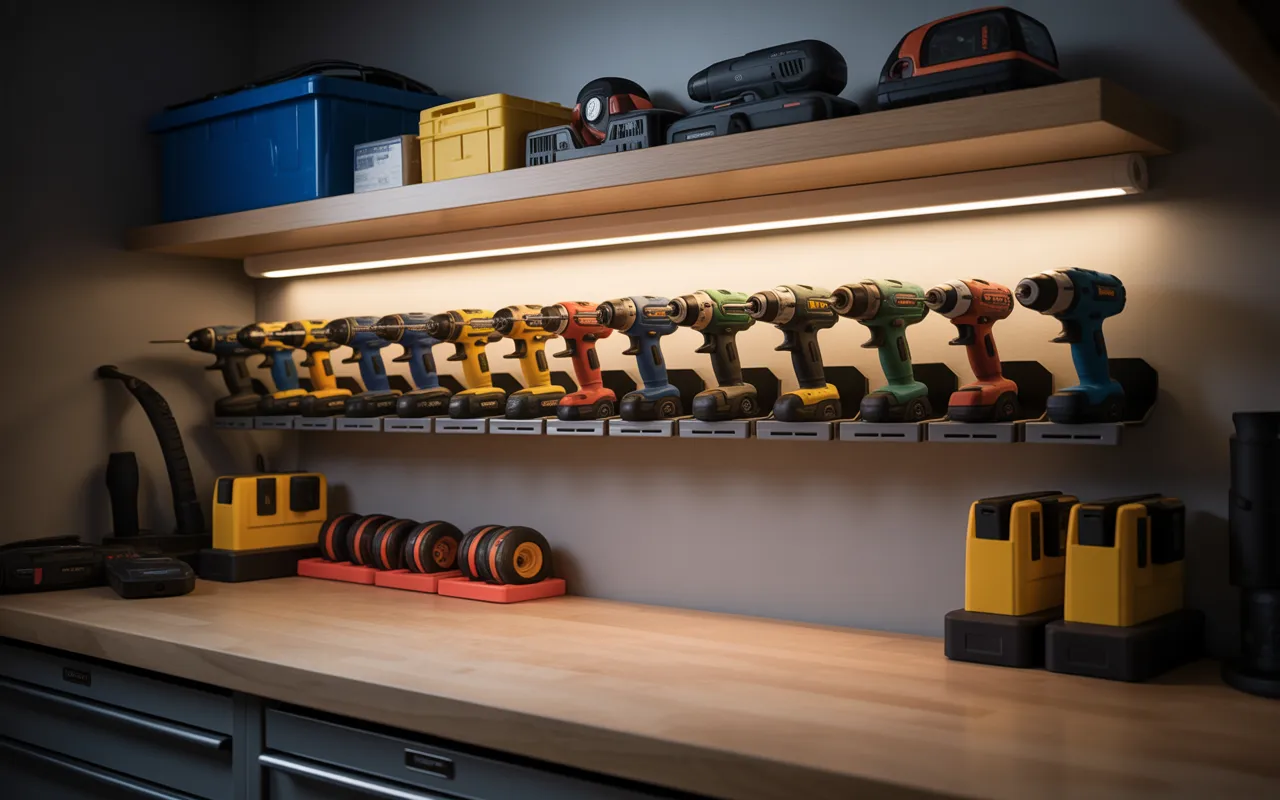
Wall-Mounted Charging Rack

I prefer wall-mounted racks because they instantly free up bench space. Mounting a sturdy rack into studs keeps everything secure, even when holding multiple drills and batteries. The open design makes it easy to grab tools quickly without digging through clutter. I also like placing it under good lighting so I can check battery levels at a glance.
Pro Tip: Keep your most-used drills at eye level so you don’t have to bend or reach every time you need them.
Vertical Tool Cubes
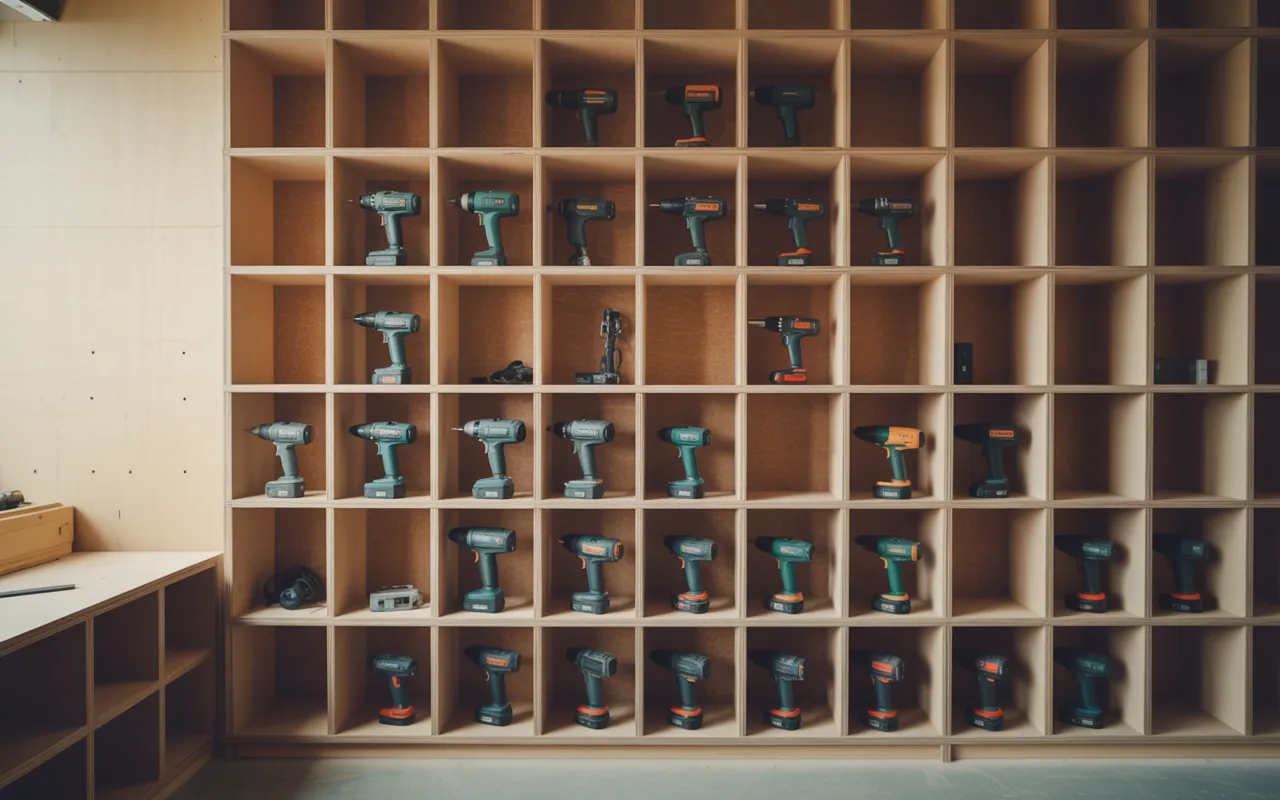
When I need organized storage with a clean look, I go for vertical cubby systems. Each tool gets its own compartment, which keeps everything separated and easy to find. I usually place heavier tools in the middle sections for better balance. This setup works especially well in larger workshops where I want everything visible at once.
Pro Tip: Label each cubby section to avoid mixing tools and to maintain organization long-term.
Custom Drill Slots

Custom slots are one of the best upgrades I’ve made in my workspace. Designing them specifically for my drills ensures a perfect fit and keeps everything secure. I cut openings that hold each drill snugly and add a top shelf for chargers. This keeps everything compact while still easy to access.
Pro Tip: Leave a little extra space around each slot so you can grab drills quickly without friction.
Plywood Charging Station
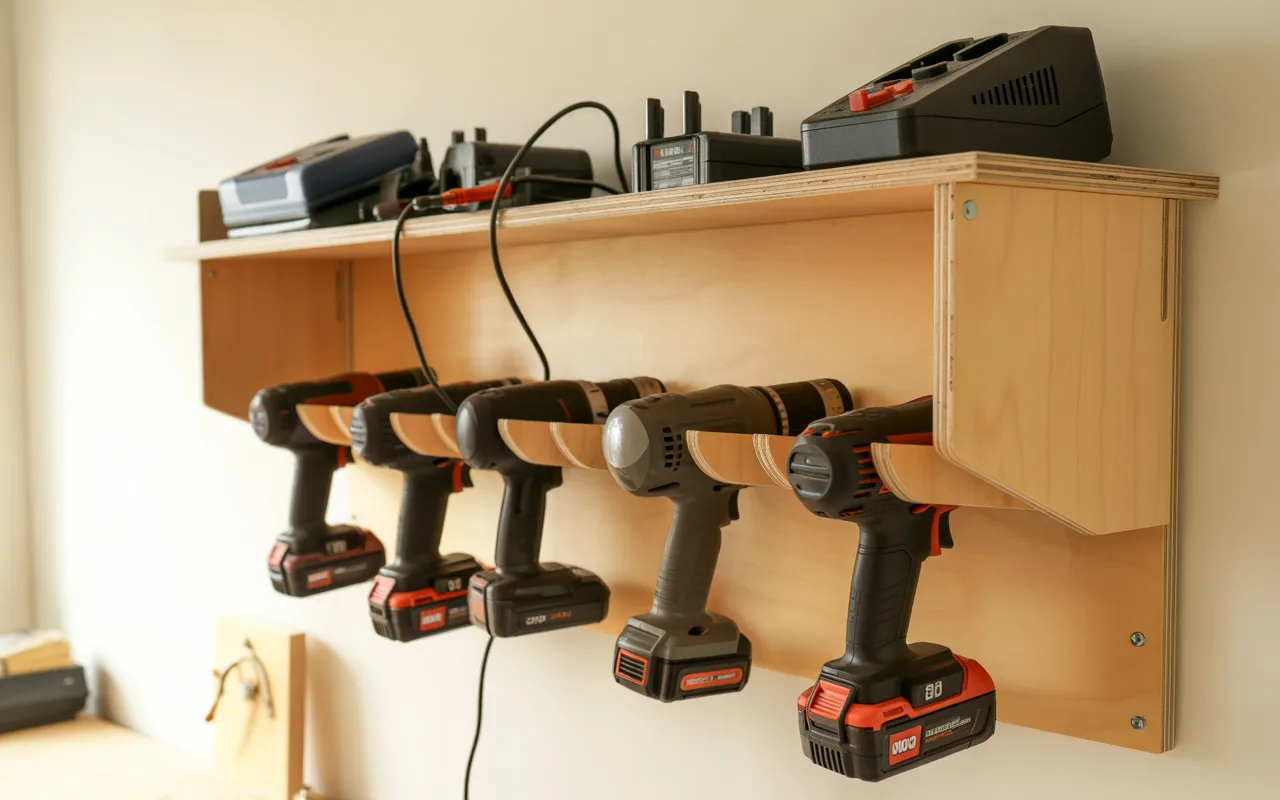
I like using plywood because it gives a clean and intentional look without being expensive. A simple box design with storage above and slots below works really well. Routing cords through the back keeps everything tidy and prevents tangling. It’s a simple solution that makes a big difference.
Pro Tip: Drill cable holes slightly larger than needed so you can easily adjust or replace chargers later.
Full Wall Organizer
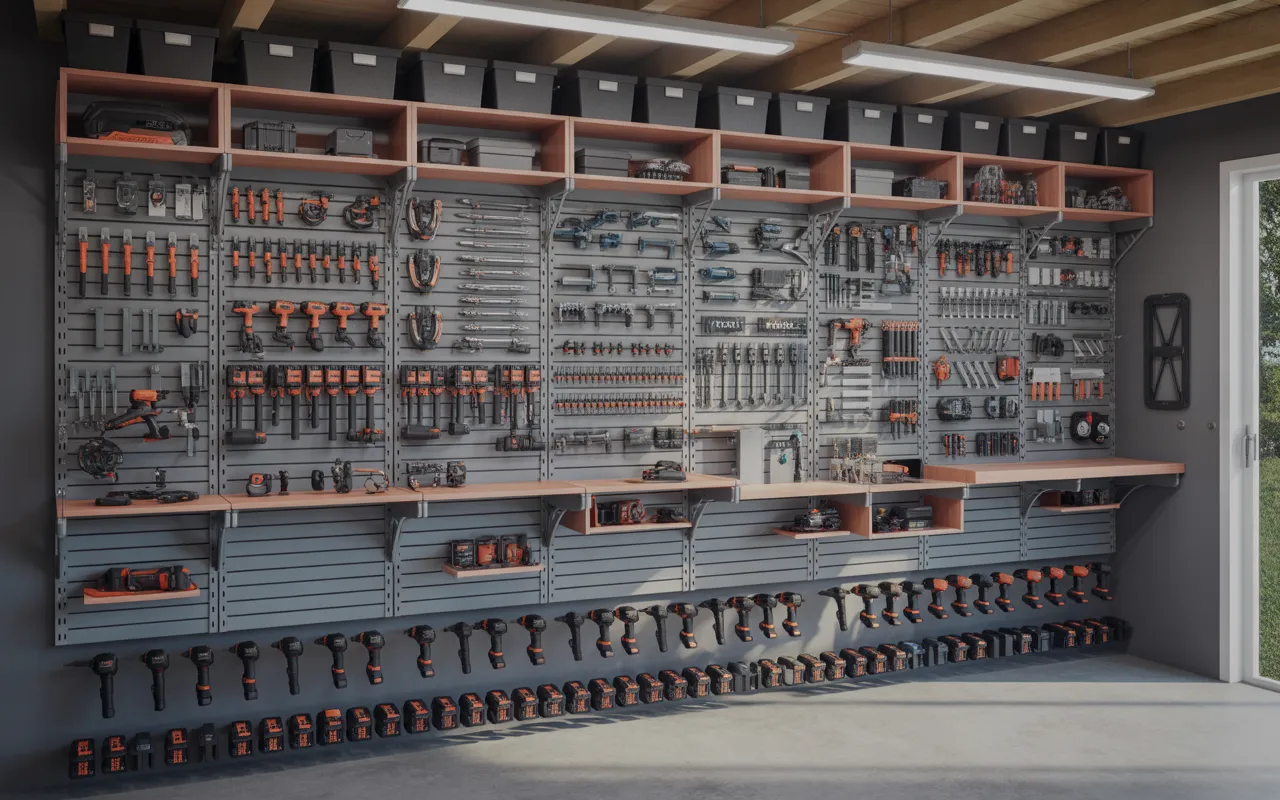
When small setups stop working, I switch to a full wall system. It combines shelves, cubbies, and hanging slots into one organized layout. This setup helps me keep everything in one place without crowding the bench. It’s perfect when you have multiple tools and accessories to manage.
Pro Tip: Group similar items together so you don’t waste time searching across different sections.
Compact Wall Cabinet
A compact cabinet works well when space is limited but I still want everything organized. It keeps drills, batteries, and accessories in one vertical structure. I like adding a small drawer for bits and loose parts to avoid clutter. It keeps everything clean and easy to maintain.
Pro Tip: Add small lips to shelves so tools don’t slide out when opening or closing the cabinet.
Bench-Top Storage Unit
Not every workspace has free wall space, and that’s where bench-top units help. I use them to keep drills below and supplies above in one compact area. Dividing the lower section into slots keeps drills from tipping over. It’s a practical option for smaller setups.
Pro Tip: Use transparent bins for small items so you can quickly see what’s inside without opening everything.
Open Shelf System
Open shelves give quick access and make it easy to spot tools instantly. I like placing bulk items on top and hanging drills underneath. This setup works well in busy workshops where speed matters. It keeps everything visible and within reach.
Pro Tip: Keep frequently used items at lower levels and rarely used ones higher up to save effort.
Minimal Slot Rack
Sometimes simple is better, and that’s why I like minimal slot racks. They don’t take much space but still keep drills organized and accessible. Mounting them under shelves helps maximize unused space. It’s a clean and efficient solution.
Pro Tip: Add LED strip lighting underneath to improve visibility, especially in darker workspaces.
Narrow Drill Tower
For tight spaces, vertical towers are a smart choice. They use height instead of width, which makes them perfect for small areas. I keep drills at eye level and store batteries below for easy access. It keeps everything organized without taking up much room.
Pro Tip: Secure tall units firmly to the wall to prevent tipping, especially when fully loaded.
Compact Plywood Station
This is a great option when I want something simple but effective. A compact plywood setup keeps drills organized without overcomplicating things. I usually add shallow shelves for accessories and slots below for drills. It’s practical and easy to build.
Pro Tip: Sand all edges smoothly to avoid wear and tear on your tools over time.
PVC Pipe Holders
PVC holders are one of the easiest DIY solutions I’ve used. They create individual slots without requiring heavy construction. They work well under shelves or inside cabinets and are great for small spaces. It’s a quick and budget-friendly option.
Pro Tip: Use thicker PVC pipes for better durability and long-term use.
Dedicated Charger Shelf
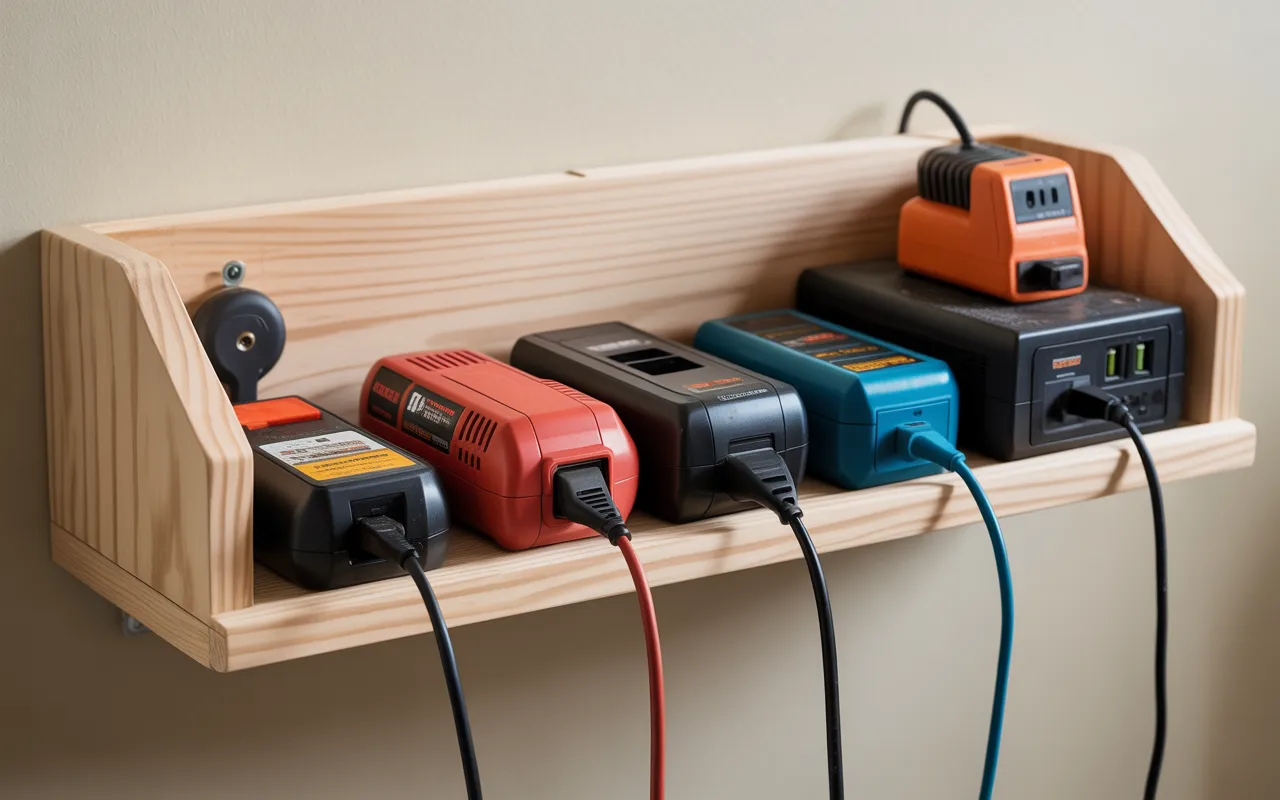
Keeping chargers in one place changed how I work. I no longer deal with dead batteries because everything charges in one spot. I build a dedicated shelf with enough space and a slight lip to keep chargers secure. It keeps cords organized and easy to manage.
Pro Tip: Use a power strip with surge protection to keep your tools safe while charging.
Built-In Charging Bay
Hidden charging setups look clean and work efficiently. I like routing cables through the back so everything stays out of sight. This setup keeps the workspace neat while still being functional. It’s one of the most polished storage solutions.
Pro Tip: Install a switch-controlled outlet so you can turn off all chargers at once when not in use.
Floor-to-Ceiling Cabinet
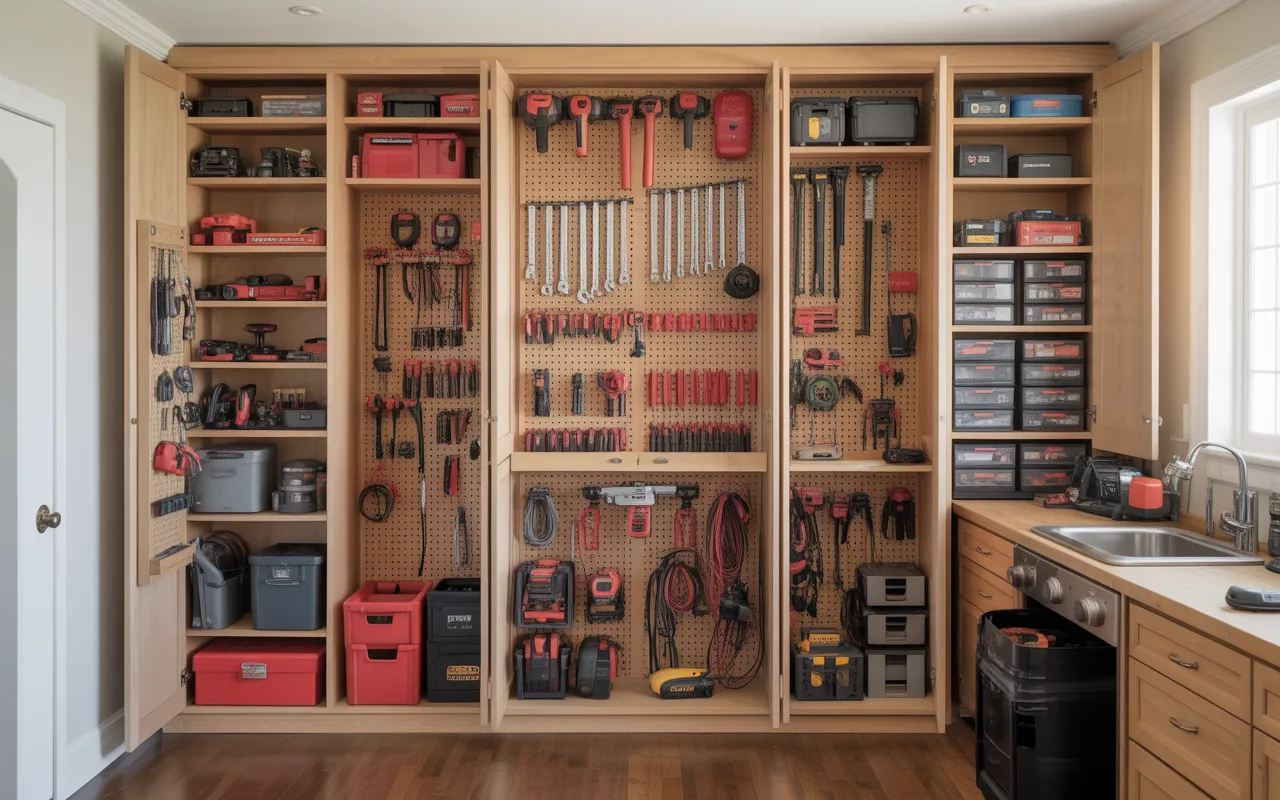
For large tool collections, I rely on full-height cabinets. They provide structured storage from top to bottom. I divide sections for tools, chargers, and accessories to keep everything organized. It’s a complete solution for serious setups.
Pro Tip: Keep the most-used items in the middle section so they’re always within easy reach.
FAQs
1. Can You Store Drills With Batteries Attached?
Yes, I usually keep batteries attached because it keeps everything ready to use. It also reduces the chances of losing or misplacing batteries. However, I make sure the battery isn’t fully drained before storing it. If temperatures are extreme, I store spare batteries separately in a safer environment.
2. What’s the Best Height to Mount a Drill Rack?
I always mount my drill rack at a height where I can easily reach it without stretching or bending. For most setups, chest to eye level works best. Mounting too high makes access difficult, while too low wastes vertical space. I always test placement before final installation to get it just right.
Conclusion
From my experience, organizing drills isn’t about having more space—it’s about using the space you already have more effectively. Once I created a system where every tool had a dedicated place, everything became easier to manage. The best part is that you don’t need a complicated setup to get started. Even a simple rack or shelf can make a huge difference if it’s planned properly. Small improvements add up quickly.
If you take the time to organize your drills now, you’ll save yourself hours of frustration later. A clean and functional workspace always makes work faster and more enjoyable.